
Want to show more than one checkout upsell in Shopify checkout, in different sections? With Checkout Plus, you can do that with Upsell Settings Profiles. Each profile controls which upsell appears, and how it looks. Then you add an Upsells & Recommended Products block in each checkout section and point it at the matching profile.
A common setup is recommended products in Order summary, plus a smaller add-on (like a gift card) near shipping. Shoppers see a small selection of relevant offers, not the same list twice.
Watch the walkthrough above, or follow the steps below.
Before you start
- Checkout Plus installed on your Shopify store
- At least two checkout upsells already created. New to upsells? Start with How to add upsells to Shopify checkout with Checkout Plus.
- A few minutes to add blocks in the checkout editor and test checkout

Step 1: Open Checkout Upsells
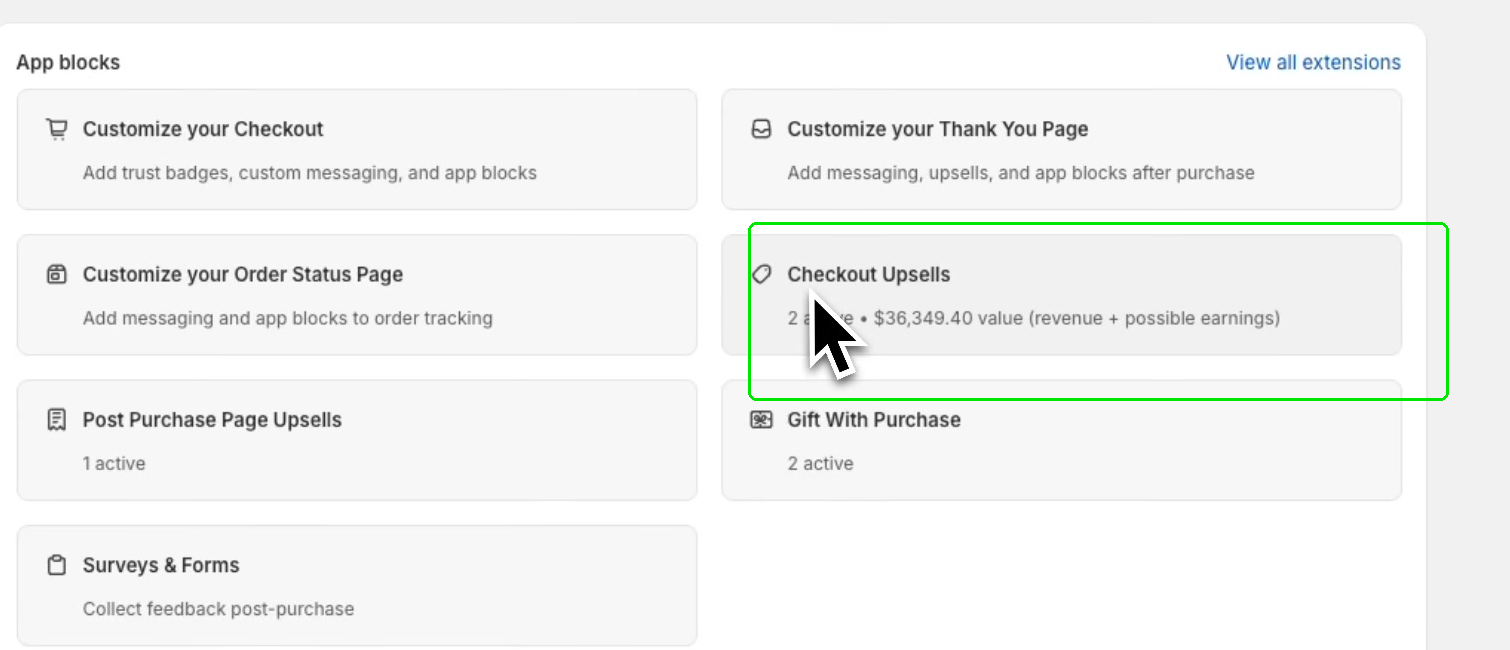
In your Shopify admin, open Apps and then Checkout Plus. Under App blocks, select Checkout Upsells.
You can also open Customize your Checkout, go to Advanced Checkout Blocks, find Upsell Products, and click Manage.
Step 2: Check your upsells
On the All Upsells page, confirm the upsells you want to show are listed and set to Active. In the walkthrough, there are two: one for recommended products and one for gift cards. Yours will use your own names and products.

Step 3: Open Advanced Settings
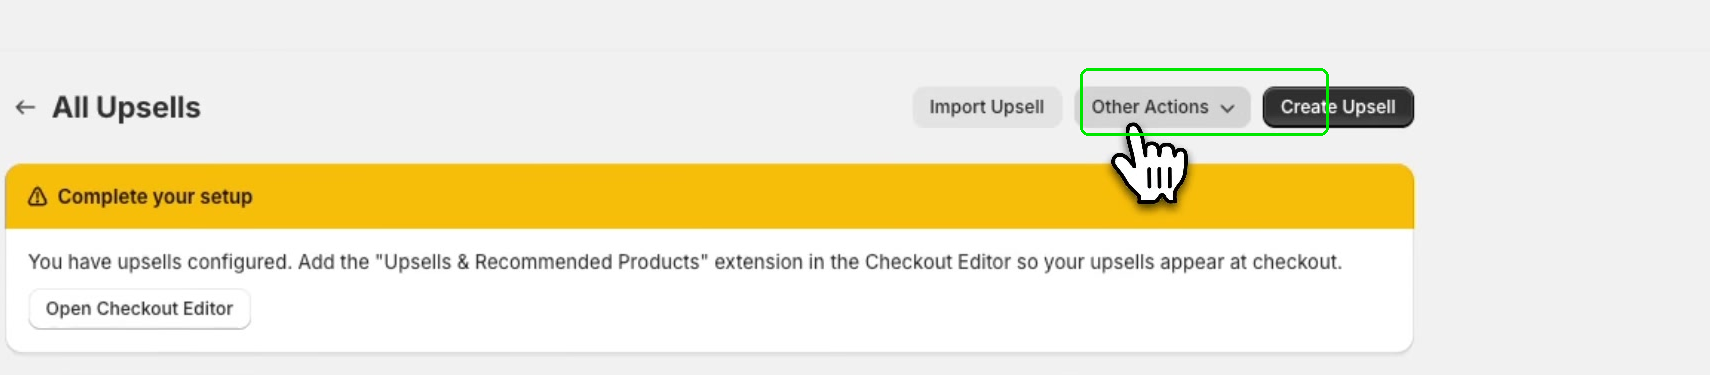
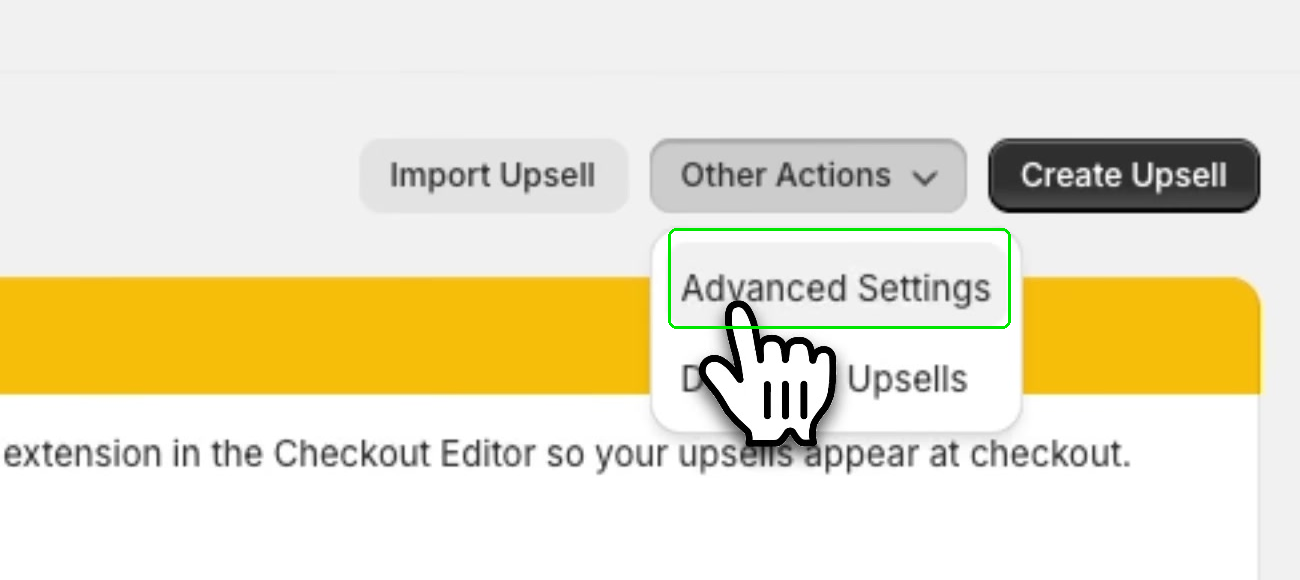
On All Upsells, click Other Actions, then select Advanced Settings. This opens Upsell Settings Profiles.
Step 4: Create a profile for the first section
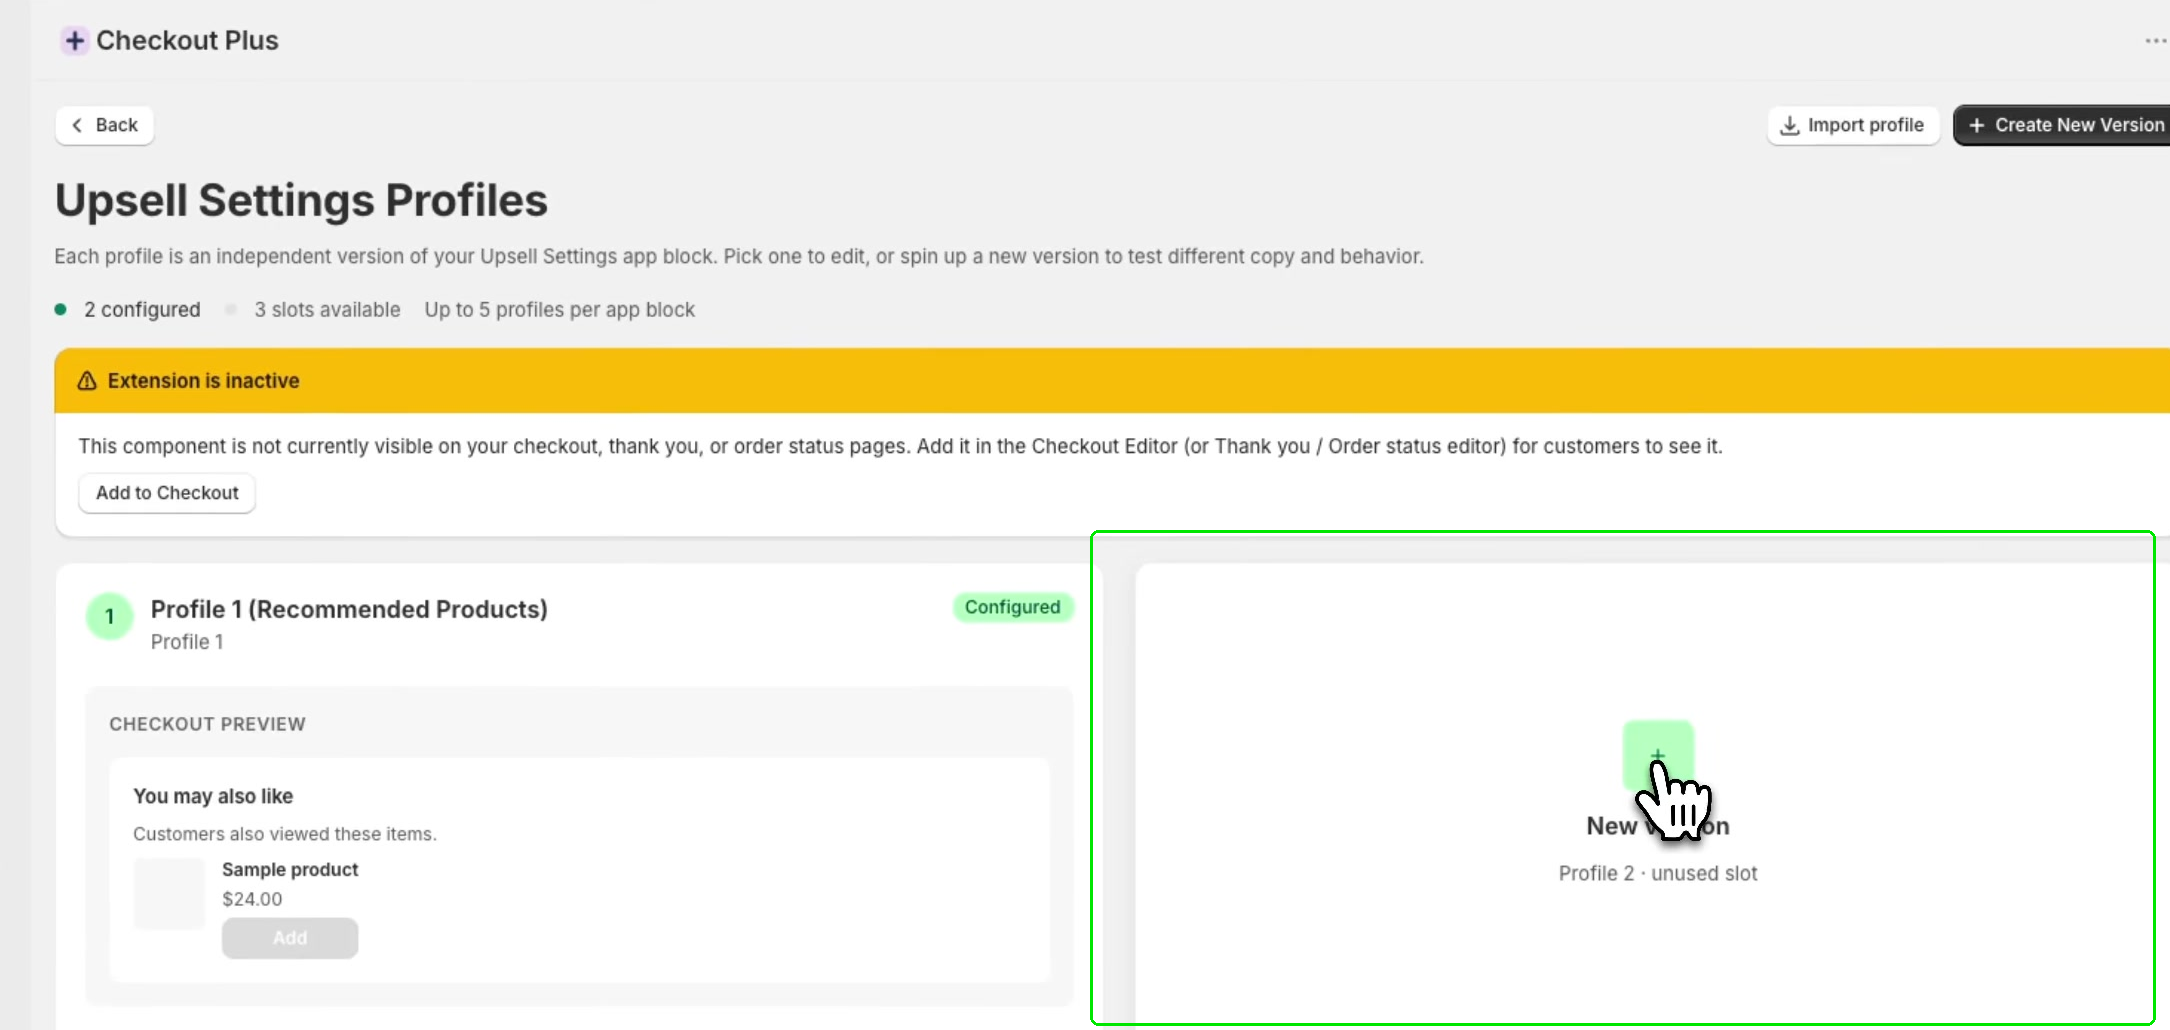
Each profile is an independent version of your upsell settings. You can have up to 5 profiles per app block, and changes apply only to the profile you are editing.
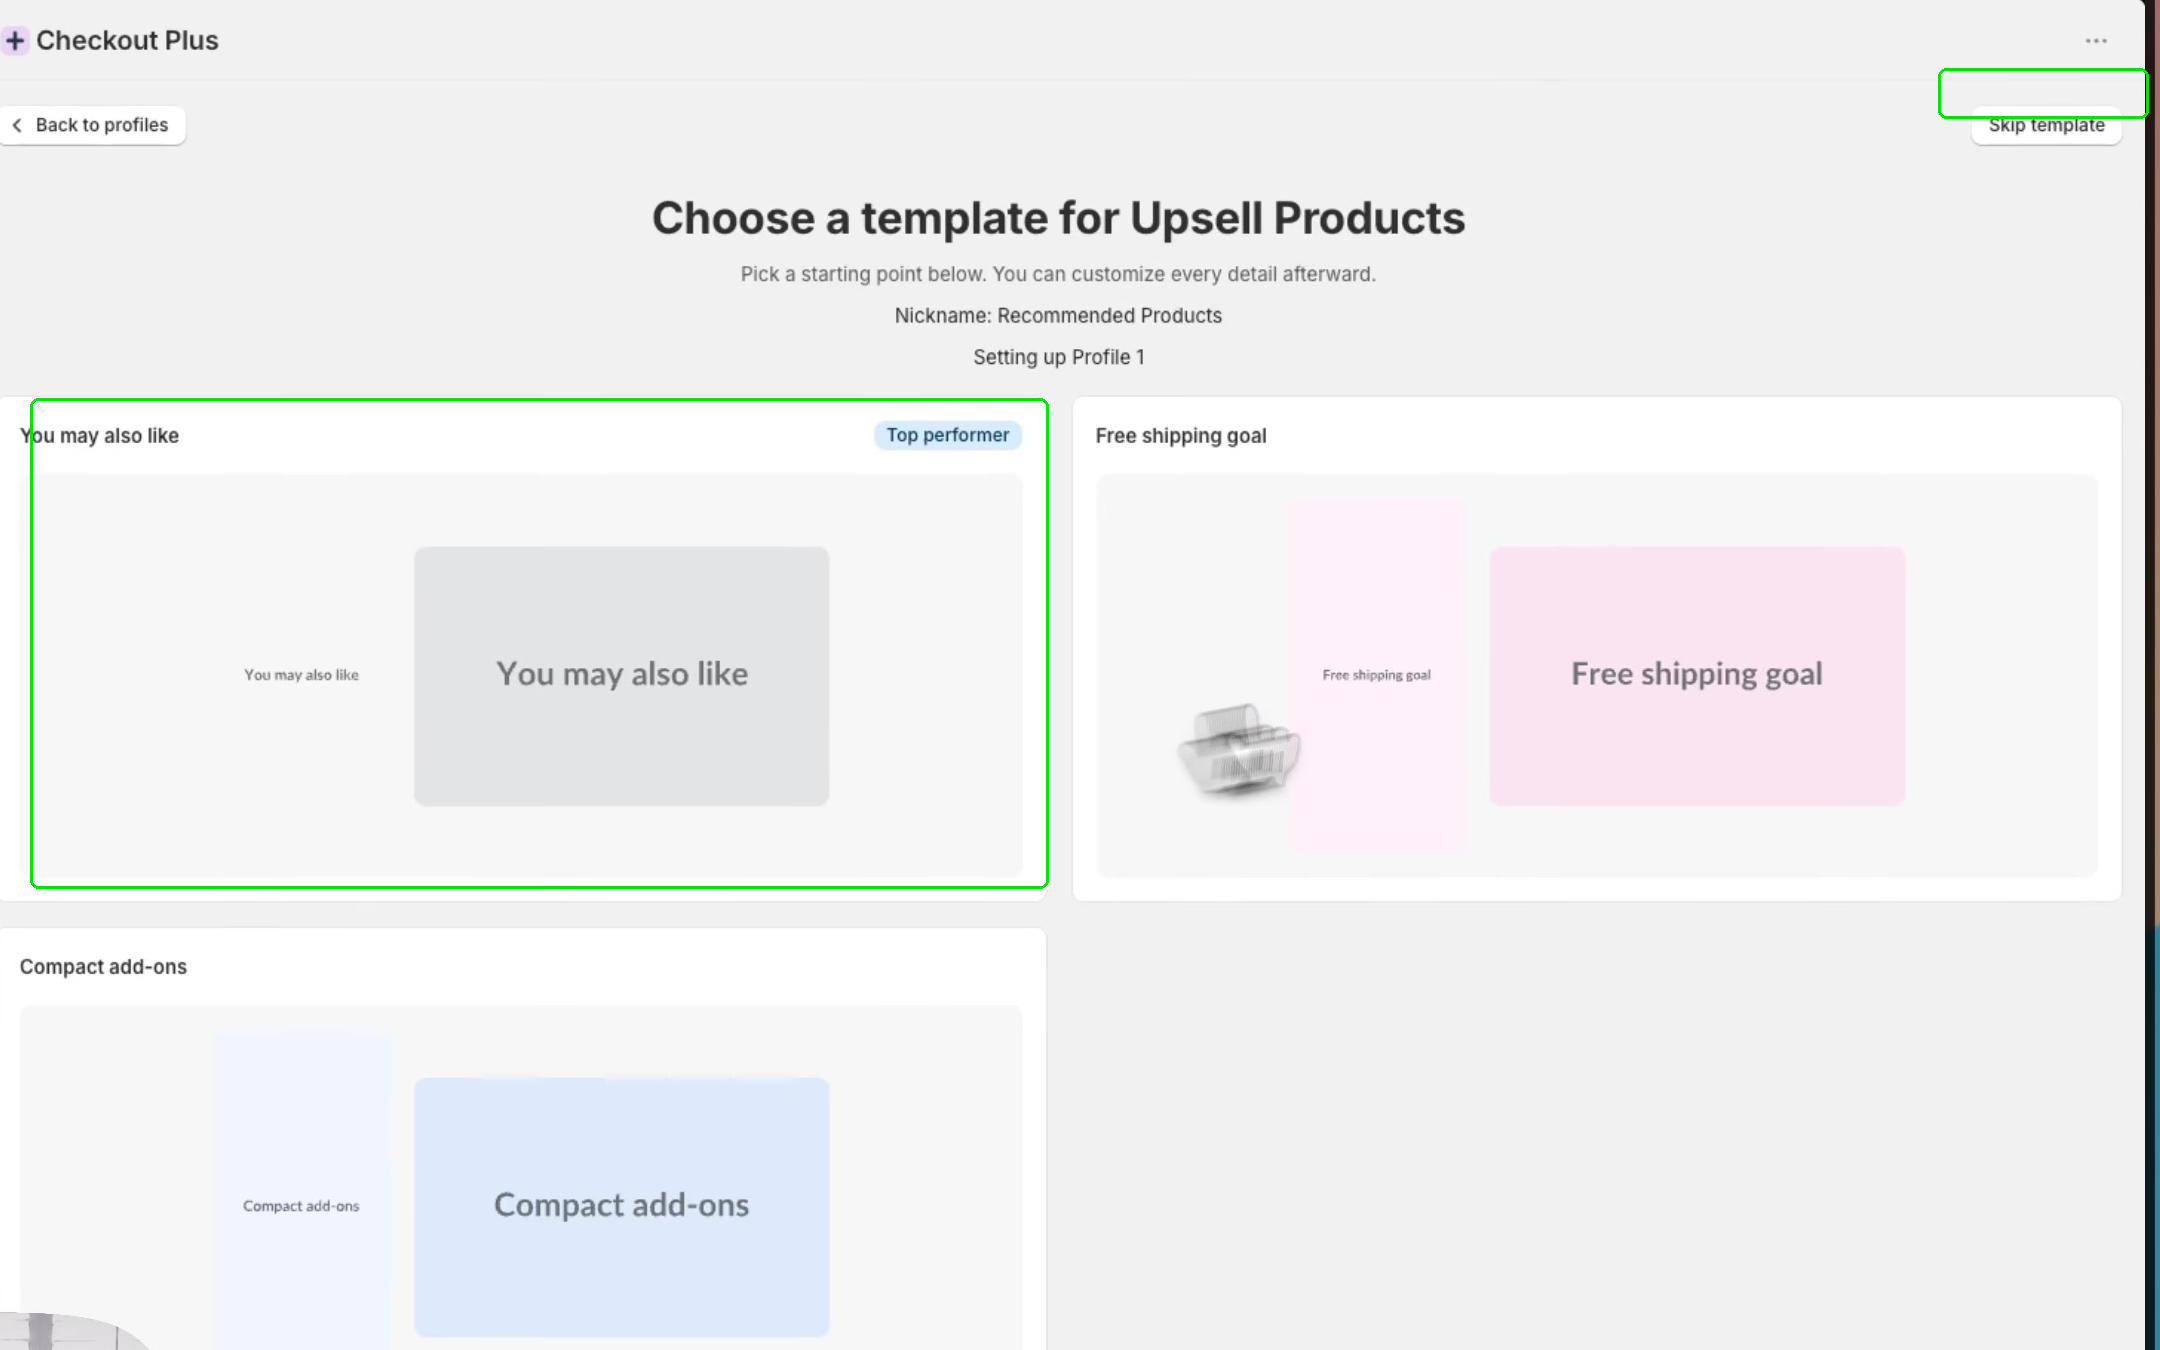
Click Create New Version, or click New version on an unused slot. Optionally enter a Nickname you will recognize, like Recommended Products, then click Continue to templates.
On Choose a template for Upsell Products, pick a starting point such as You may also like, or click Skip template to set things yourself. You can change every setting afterward.
Step 5: Choose which upsell this profile shows
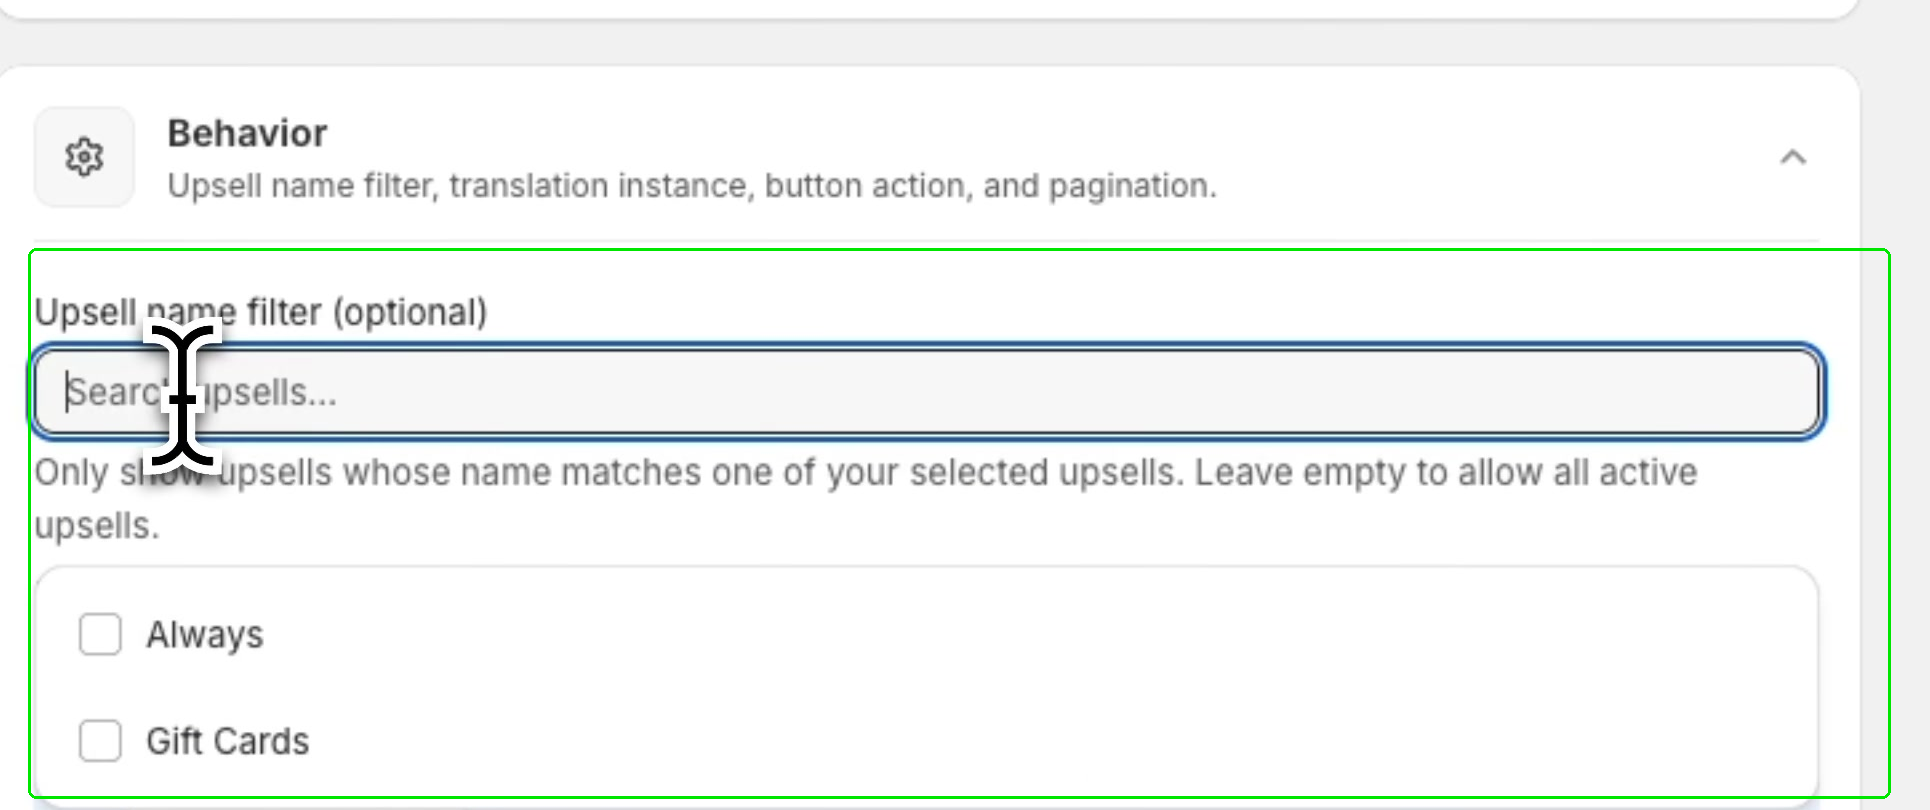
Open the Behavior section. Under Upsell name filter (optional), select the upsell this profile should show. Only upsells whose name matches one of your selected upsells will appear. Leave the filter empty to allow all active upsells.
In General, review Layout and Number of Products to Display if you want to change how the offer looks. A template like You may also like sets a default layout for you. Click Save.
If you see a message that your upsell extension is configured but not yet added to checkout, you can click Dismiss for now. You will add the blocks in the checkout editor in the next steps.
Step 6: Create a profile for the second section
Repeat the same flow for your other upsell. Back on Upsell Settings Profiles, click Create New Version or New version on the next unused slot. Optionally set a Nickname, like Gift Card, then continue. Pick a template, or click Skip template.
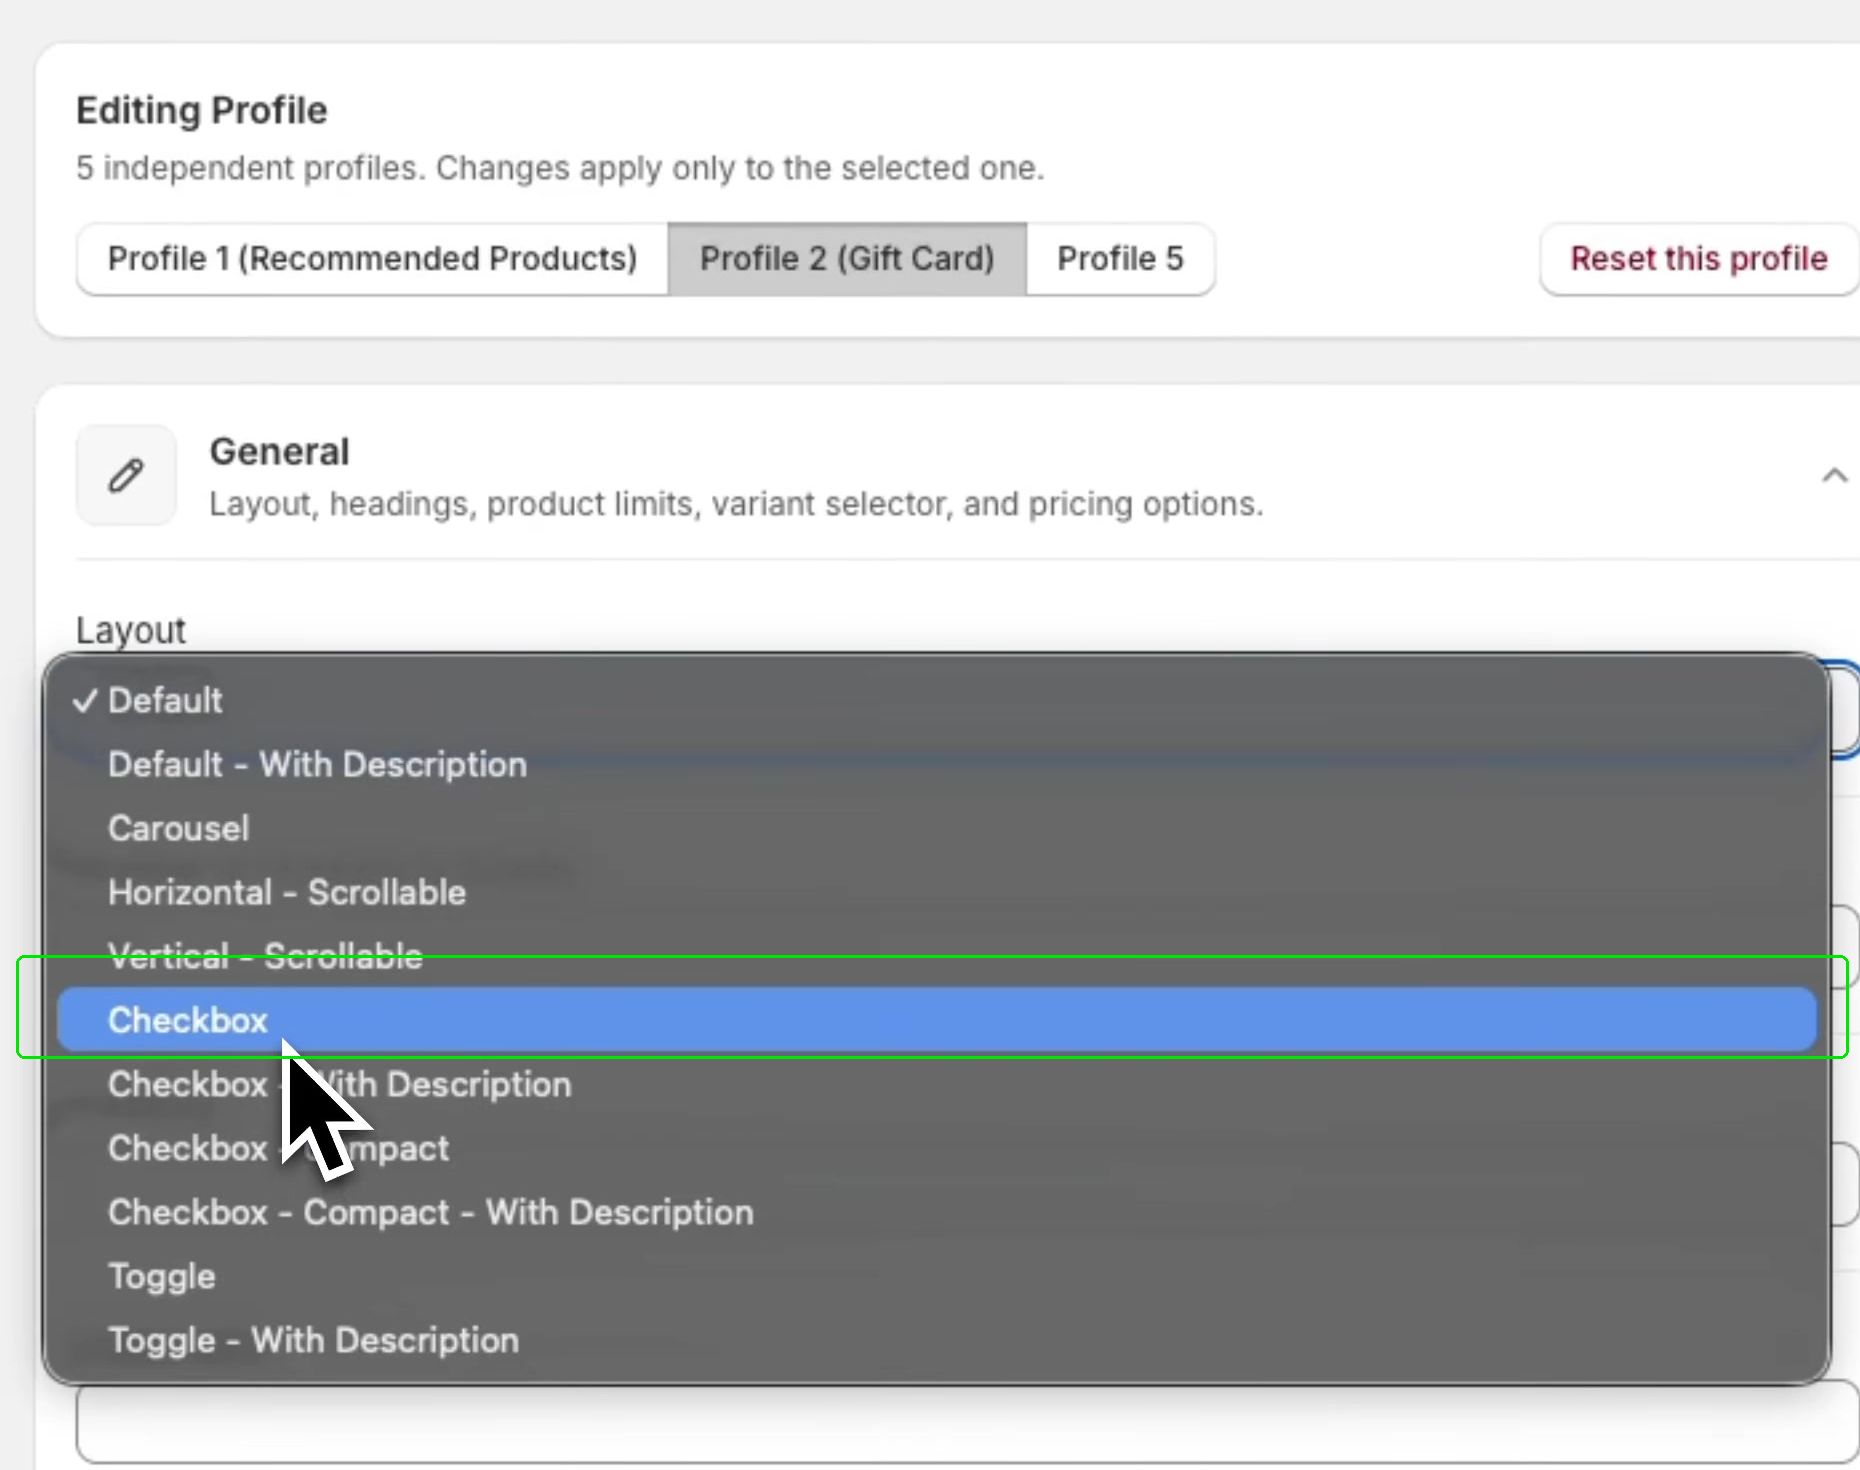
In Behavior, set Upsell name filter (optional) to the other upsell. In General, set Layout to match the offer. For a yes or no add-on like a gift card, Checkbox is a good fit. Click Save.
Step 7: Add the first block in the checkout editor
Open the checkout editor. You can click Open Checkout Editor from the banner on All Upsells, or in your Shopify admin go to Settings, then Checkout, and open the editor.
In the section where you want the first offer, such as Order summary, click Add block. Search for upsells, then add the Checkout Plus Upsells & Recommended Products block.
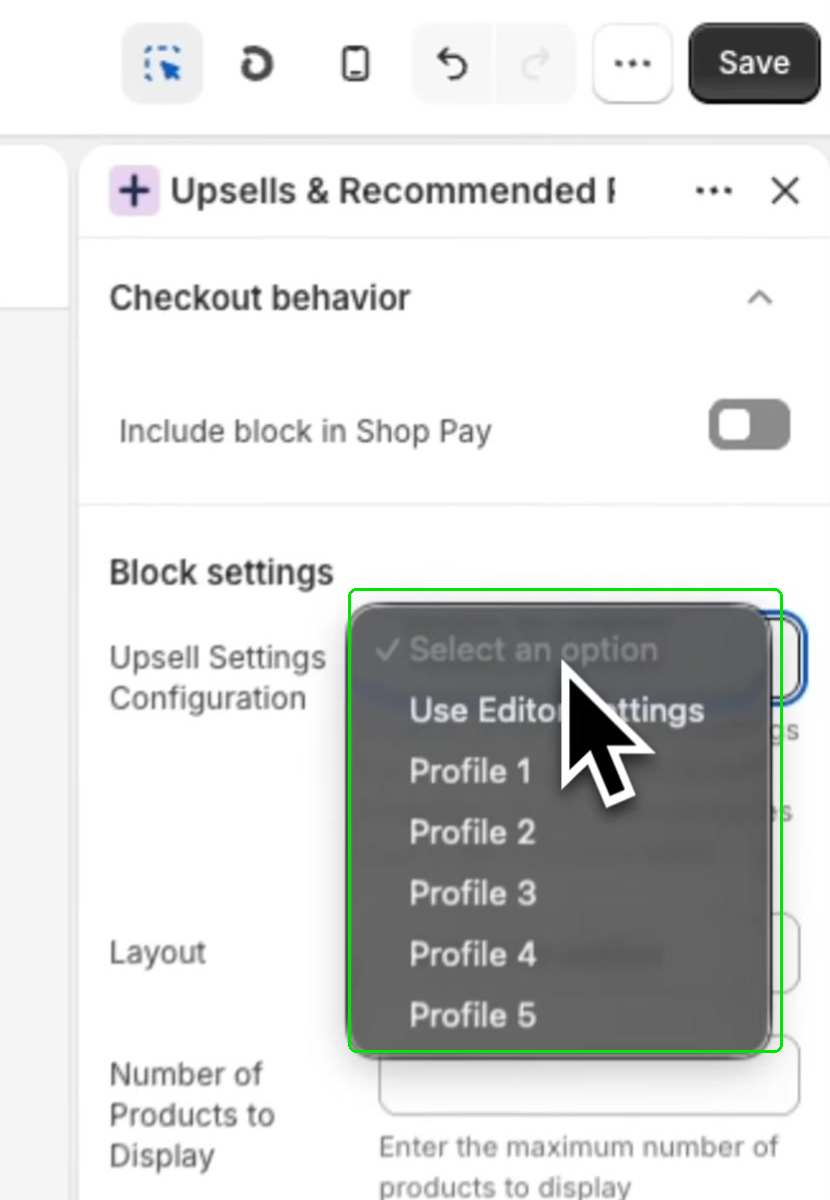
In Block settings, set Upsell Settings Configuration to the matching profile, such as Profile 1. Under Checkout behavior, turn on Include block in Shop Pay if you want this block to show in Shop Pay.
If the profile already supplies the heading and product count, you can leave Layout, Number of Products to Display, Heading, and Subheading empty in the editor so the profile values are used.

Step 8: Add the second block and assign its profile
In another checkout section, such as Main near Shipping address, click Add block and add another Upsells & Recommended Products block. Set Upsell Settings Configuration to the other profile, such as Profile 2. Optionally turn on Include block in Shop Pay for this block too, then click Save in the checkout editor.
Step 9: Test checkout
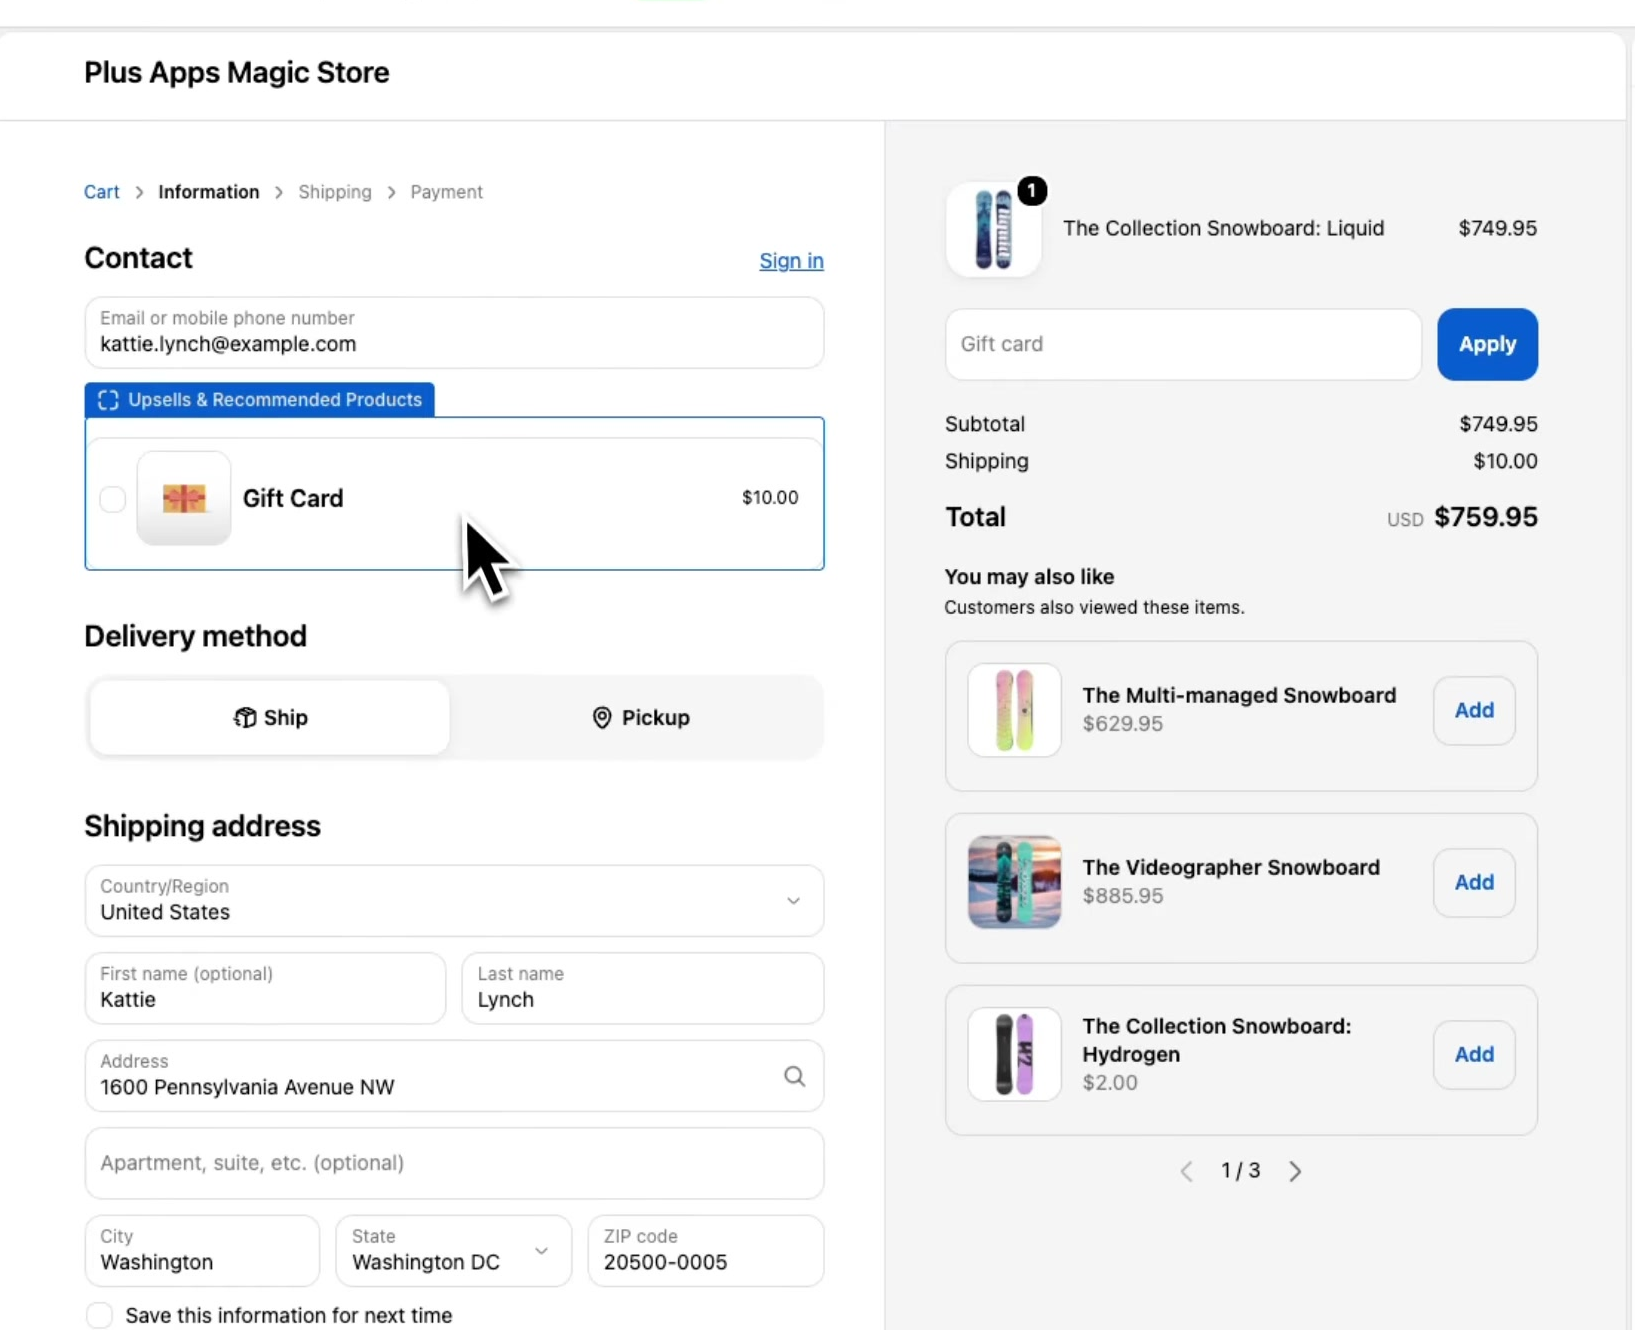
From your storefront, add a product to your cart and go to checkout. Confirm each section shows the offer you assigned to that profile. In the example, a gift card checkbox appears near contact and delivery, and recommended products appear in Order summary under You may also like. Try it on desktop and mobile. Product names and prices in the screenshots are just examples.
Tips
- Use one profile per checkout section. You can have up to 5 profiles per app block. Give each profile a nickname you will recognize.
- Filter by upsell name so sections stay distinct. Set Upsell name filter (optional) on each profile, then assign that profile on the matching checkout block. Leave the filter empty only if you want that block to allow all active upsells.
- Match the layout to the offer. A product grid or You may also like works well for recommended products. Checkbox is a simple yes or no for a single add-on.
- Keep the selection small. A few relevant add-ons in the right places are easier for shoppers than showing everything in every section.
- Want ideas for what to offer? See 6 checkout upsells to set up before Black Friday.
Troubleshooting
Neither upsell is showing at checkout
Add the Upsells & Recommended Products block in the checkout editor and click Save. Make sure each upsell's Status is Active.
Both sections show the same products
Set Upsell name filter (optional) on each profile to the upsell that section should show. Then set each block's Upsell Settings Configuration to the matching profile, and click Save.
I only see one upsell section
Add a second Upsells & Recommended Products block in another checkout section and set Upsell Settings Configuration to the other profile.
I can't find Advanced Settings
On All Upsells, click Other Actions, then select Advanced Settings.
The offer doesn't appear in Shop Pay
On that block, turn on Include block in Shop Pay, then click Save.
I created a profile, but checkout did not change
The profile has to be selected on the block. In the checkout editor, set Upsell Settings Configuration to that profile, then click Save.
Wrapping up
Once each profile is filtered to the right upsell and each checkout block points at the matching profile, shoppers can see different offers in different parts of checkout. Save the editor, then test it once on desktop and mobile.
Ready to try it? Install Checkout Plus from the Shopify App Store.