

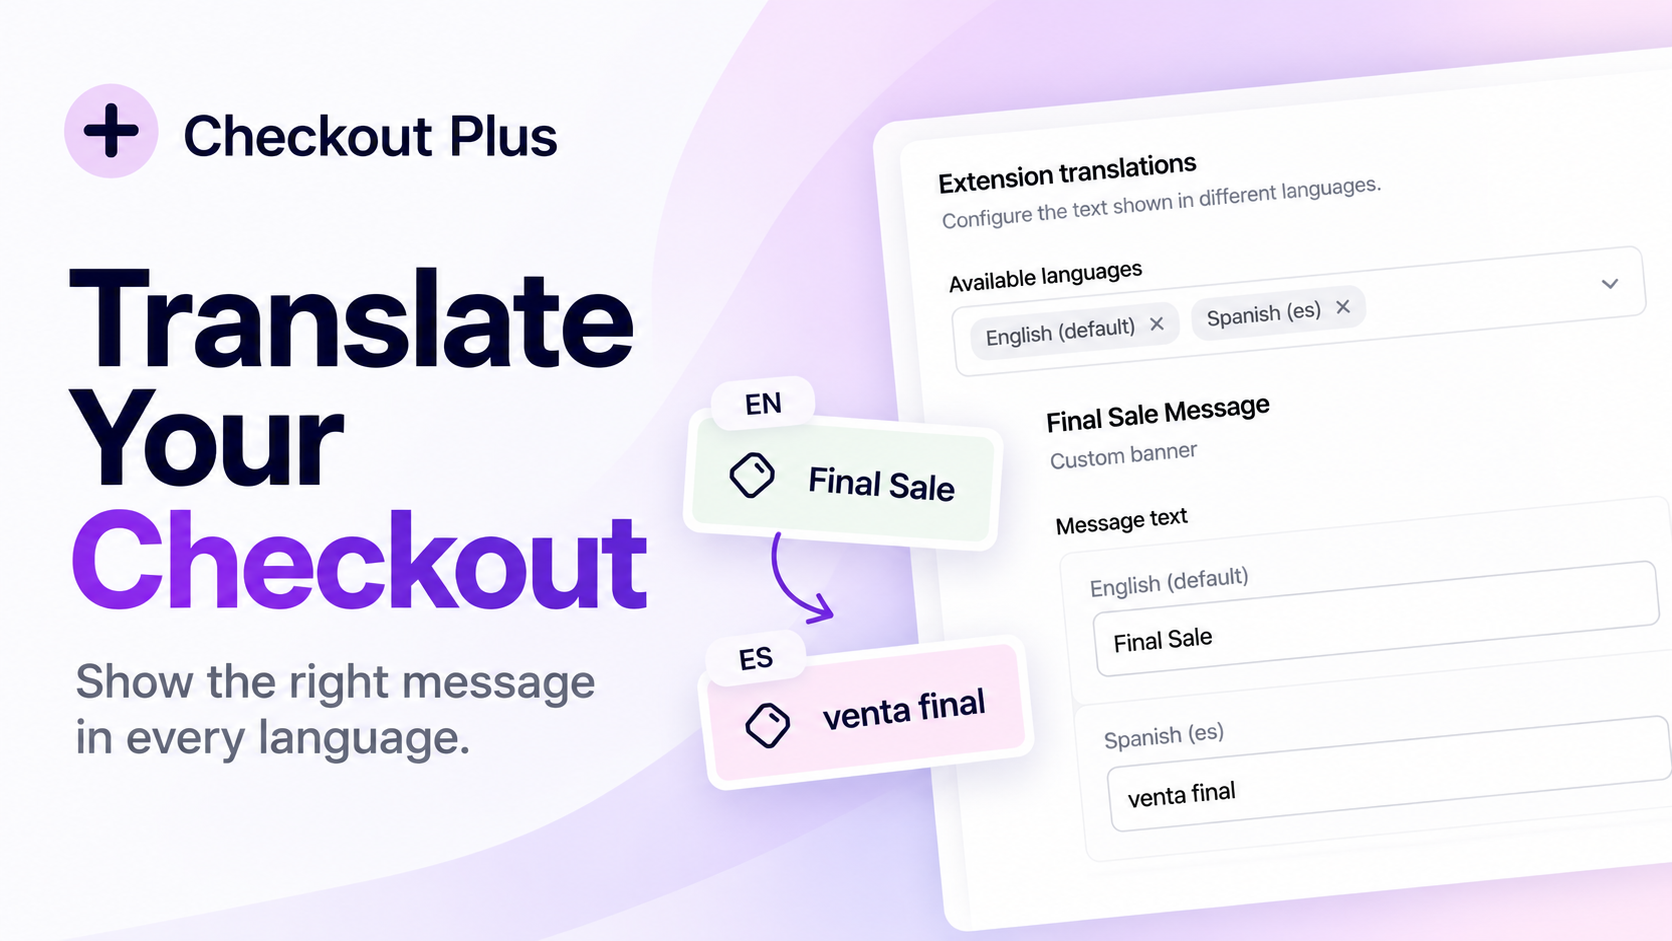
Want the same Line Item Message, banner, or other Checkout Plus block to show in Spanish, French, or any language your storefront supports? Checkout Plus keeps those strings in Extension translations — named instances you can reuse across profiles and checkout blocks. This guide walks through a full example: a Final Sale Message that shows “Final Sale” by default and “venta final” for Spanish shoppers.
Before you start
- Checkout Plus installed on your Shopify store
- Access to the Shopify Checkout Editor (checkout placement requires Shopify Plus; Thank You and Order Status pages work on all plans)
- At least one checkout language enabled in Shopify (for example Spanish) so you can preview translations
- A clear name for each message you want to translate (for example
Final Sale Message)
Step 1: Open Extension translations
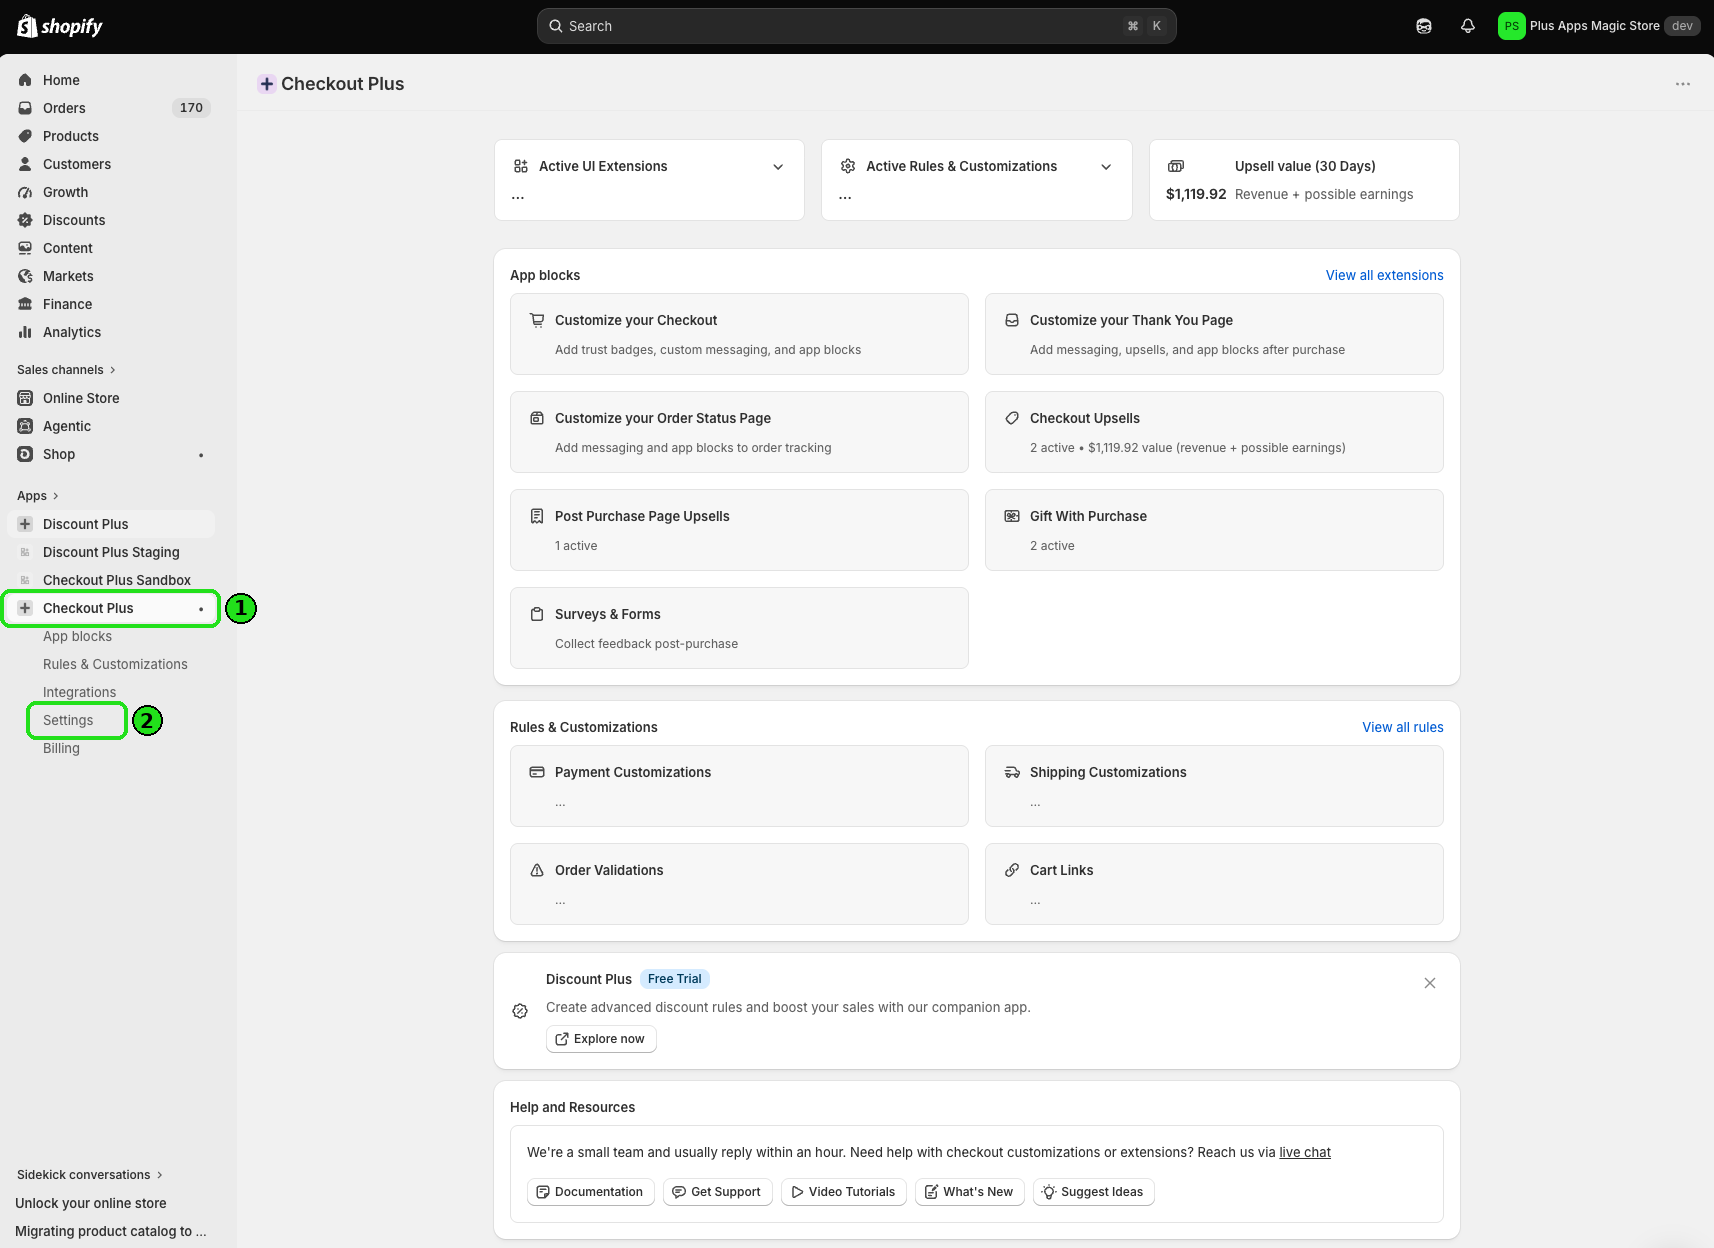
- In Shopify admin, go to Apps → Checkout Plus → Settings.
- On the Settings page, find Extension translations and select Open extension translations.
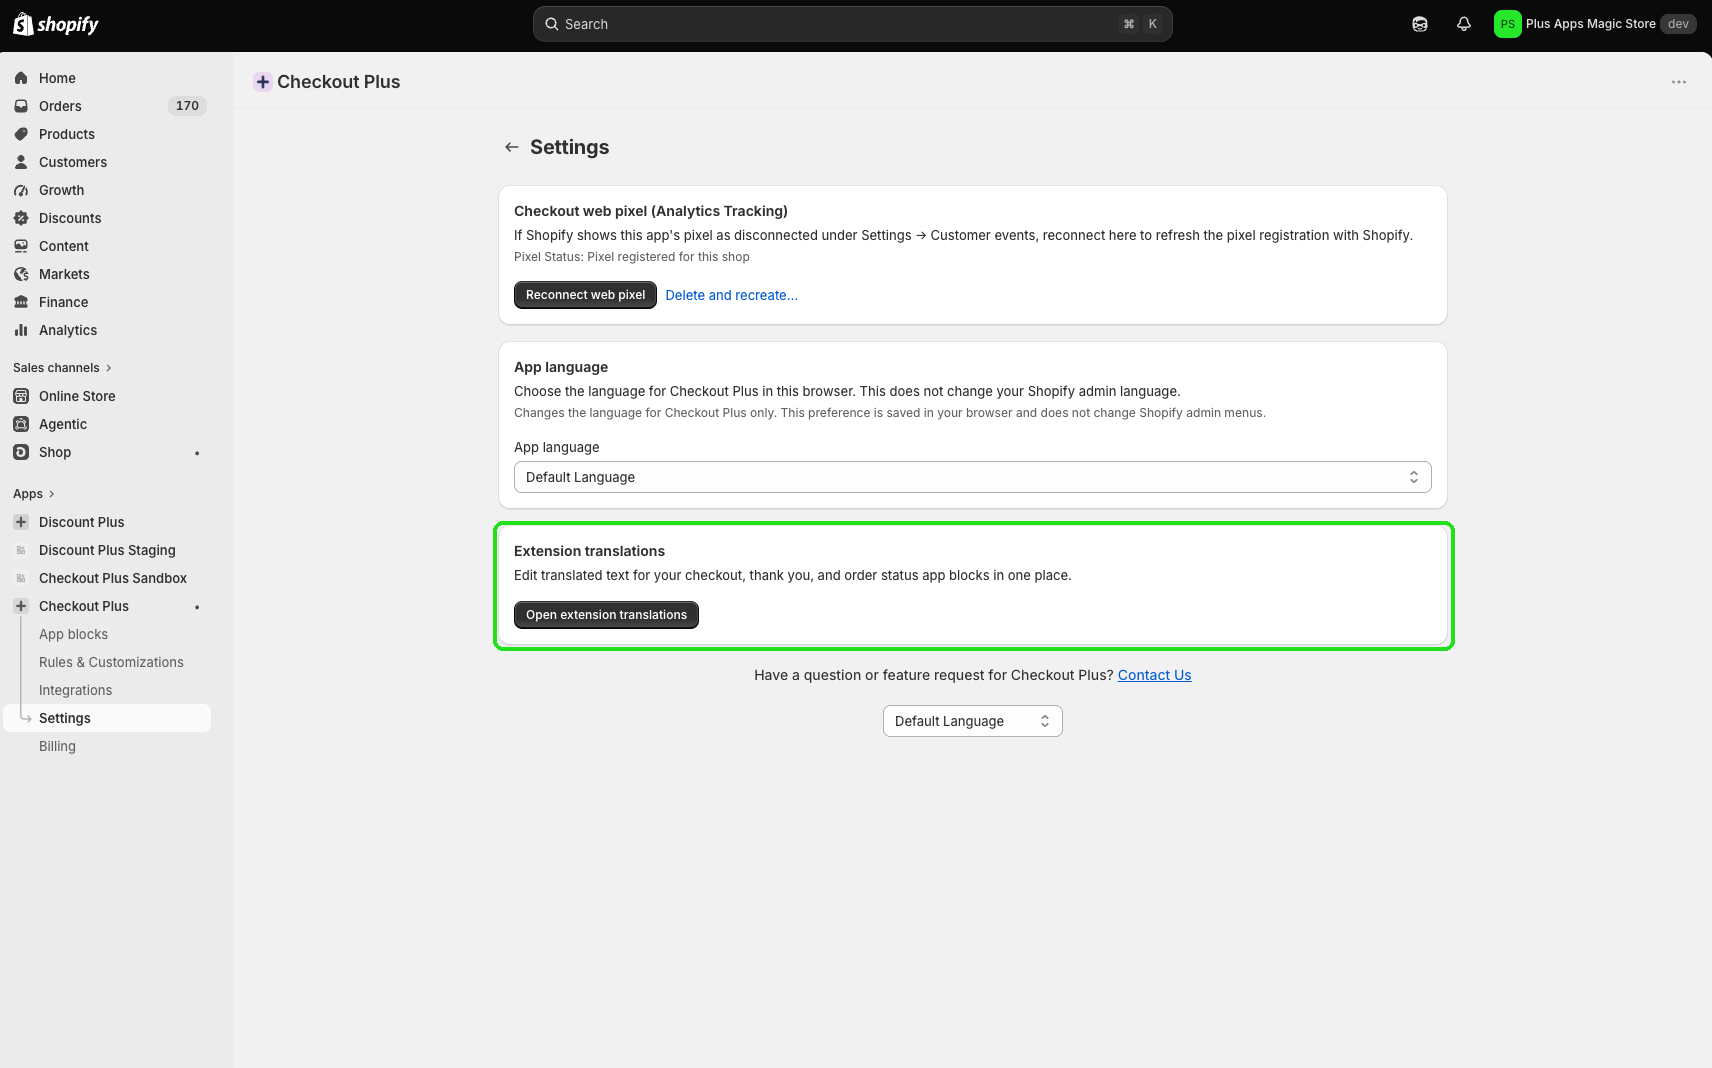
Note: The App language setting on the same page only changes the Checkout Plus app UI in this browser. It does not translate what customers see at checkout. Use Extension translations for that.
Step 2: Add a language and a Line Item Message instance
We’ll use Line Item Message as the example. The same layout applies to other block tabs (Banners, Checkbox, Custom Input, and so on).
Add a language
- On Extension Translations, under Available Languages, select + Add Language.
- Choose a language (for example Spanish).
- Select Add.
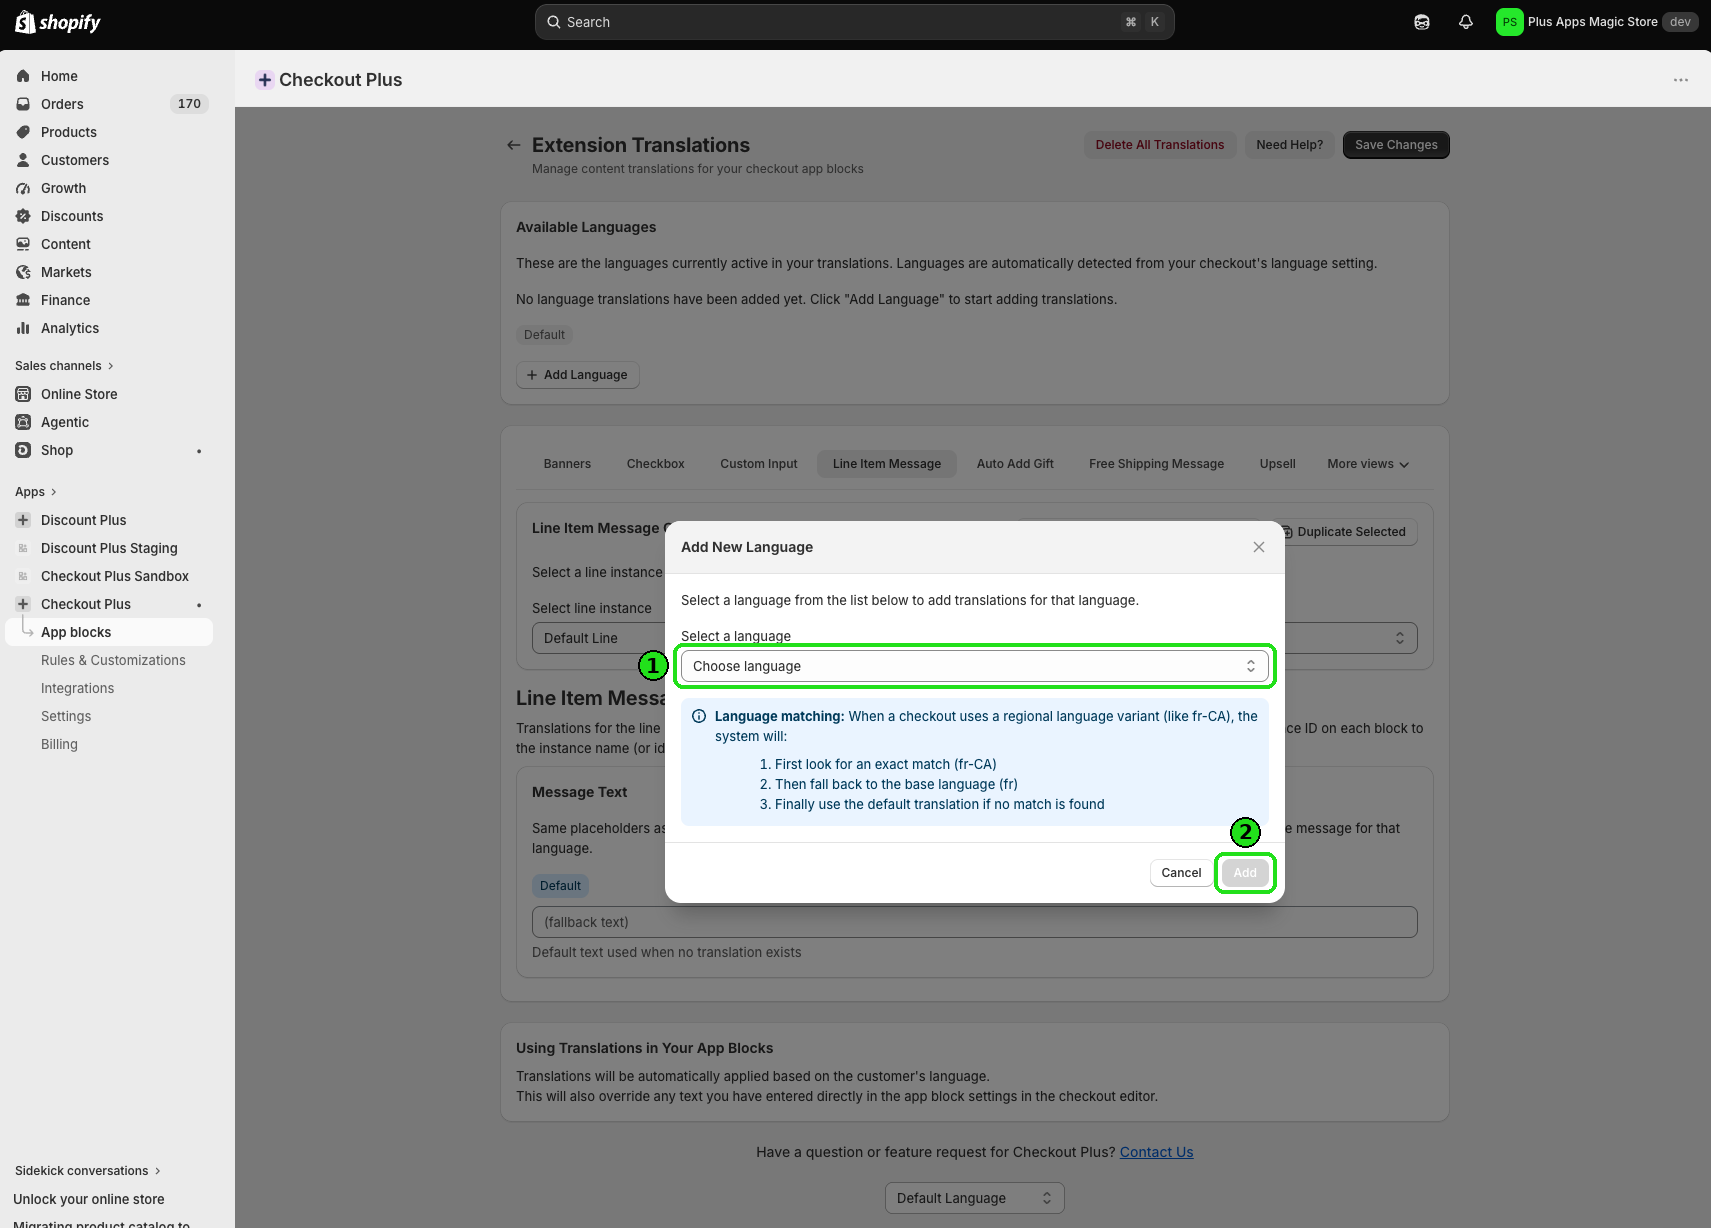
Language matching: When checkout uses a regional locale (for example fr-CA), Checkout Plus looks for an exact match first, then the base language (fr), then the default translation.
Create a named instance
- Open the Line Item Message tab.
- Select + Add Line Item Message Component (or the add control shown for that block).
- Enter a descriptive Line name — for example Final Sale Message.
- Select Add.
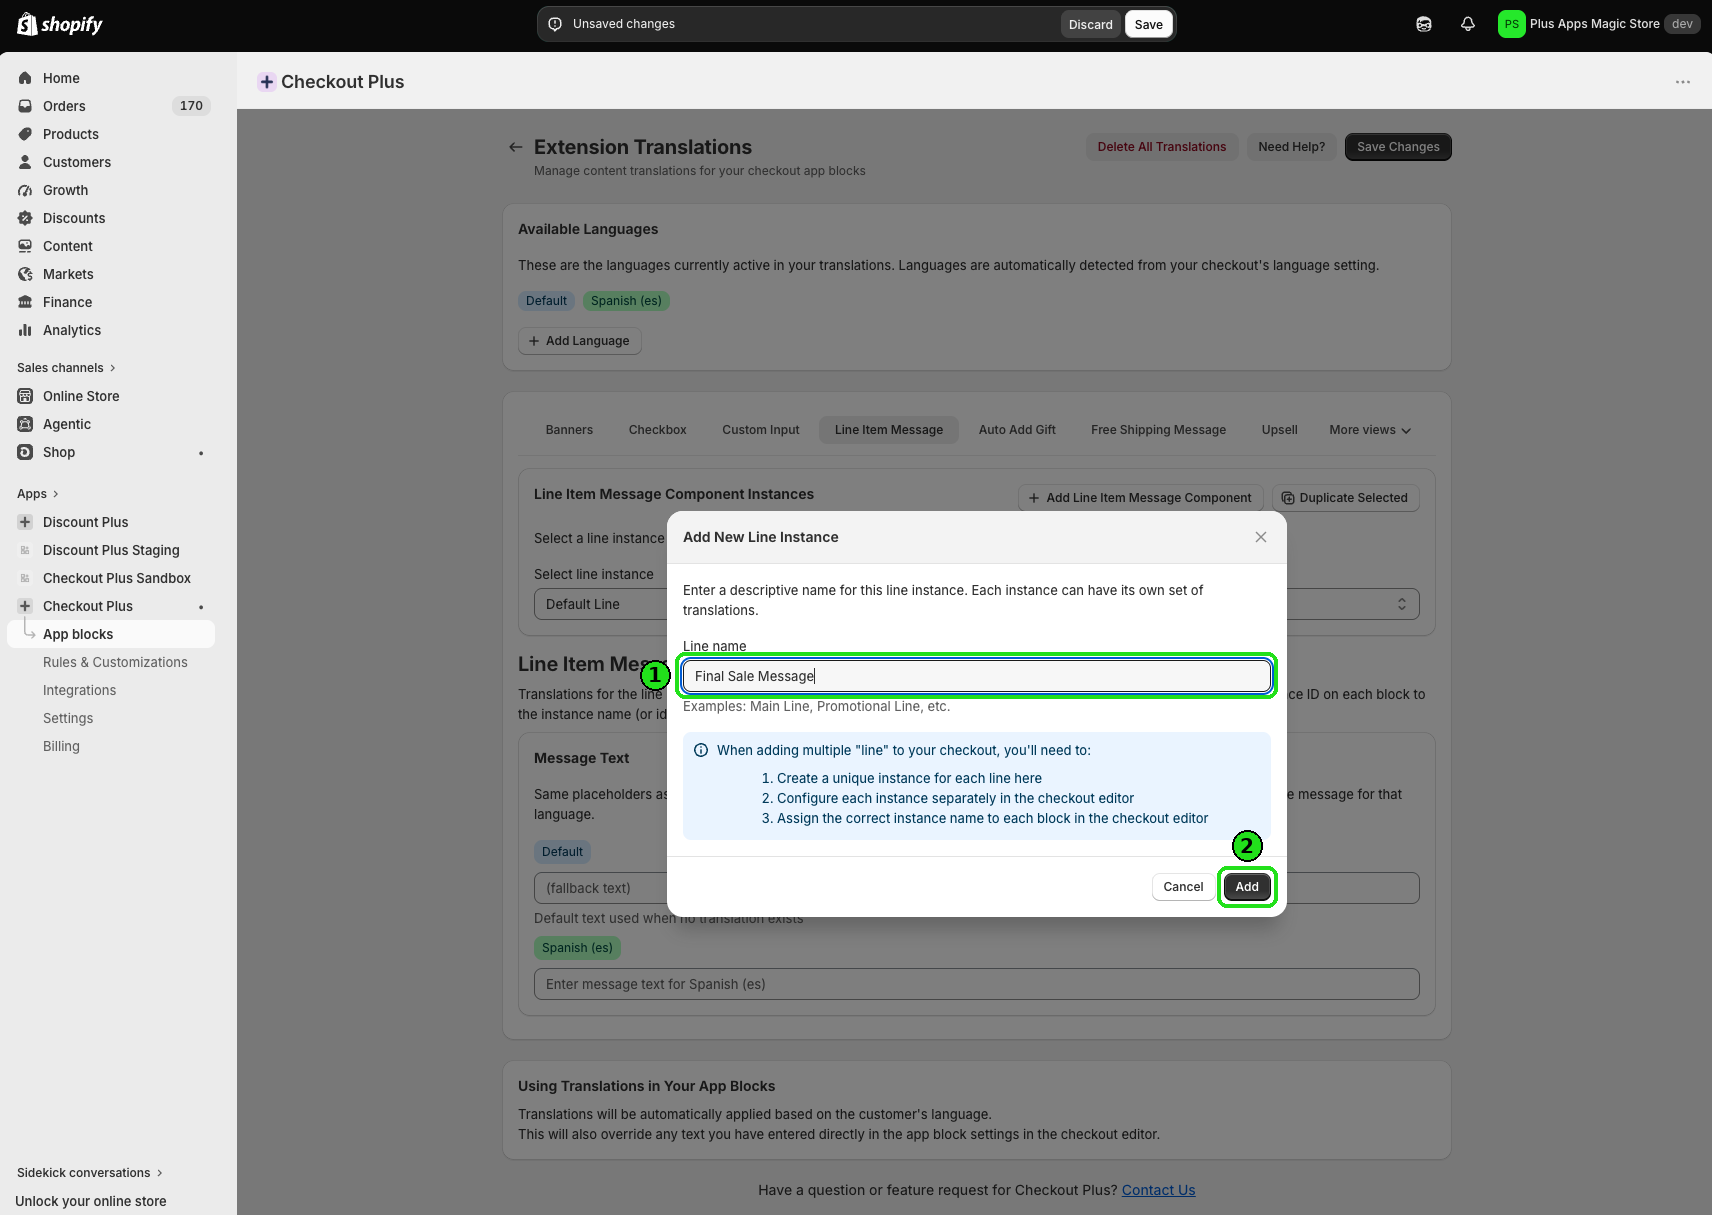
Each instance is its own set of translated strings. The modal’s note is worth keeping: (1) create a unique instance here, (2) configure each instance in the checkout editor, and (3) assign the correct instance name to each block.
Fill in Default and Spanish, then save
- Under Select line instance, choose Final Sale Message.
- In Message Text, set Default to
Final Saleand Spanish (es) toventa final. - Read the Using Translations in Your App Blocks note: translations apply by the customer’s language and override text entered directly in the checkout editor.
- Select Save Changes.

Tip: Leave a language blank and Checkout Plus falls back to the block’s editor or profile message for that language.
Optional path if you prefer to start from App blocks: Apps → Checkout Plus → App blocks → Browse, search line item, open Line Item Message, and select Manage — then use Translations from Advanced Settings (Step 3).
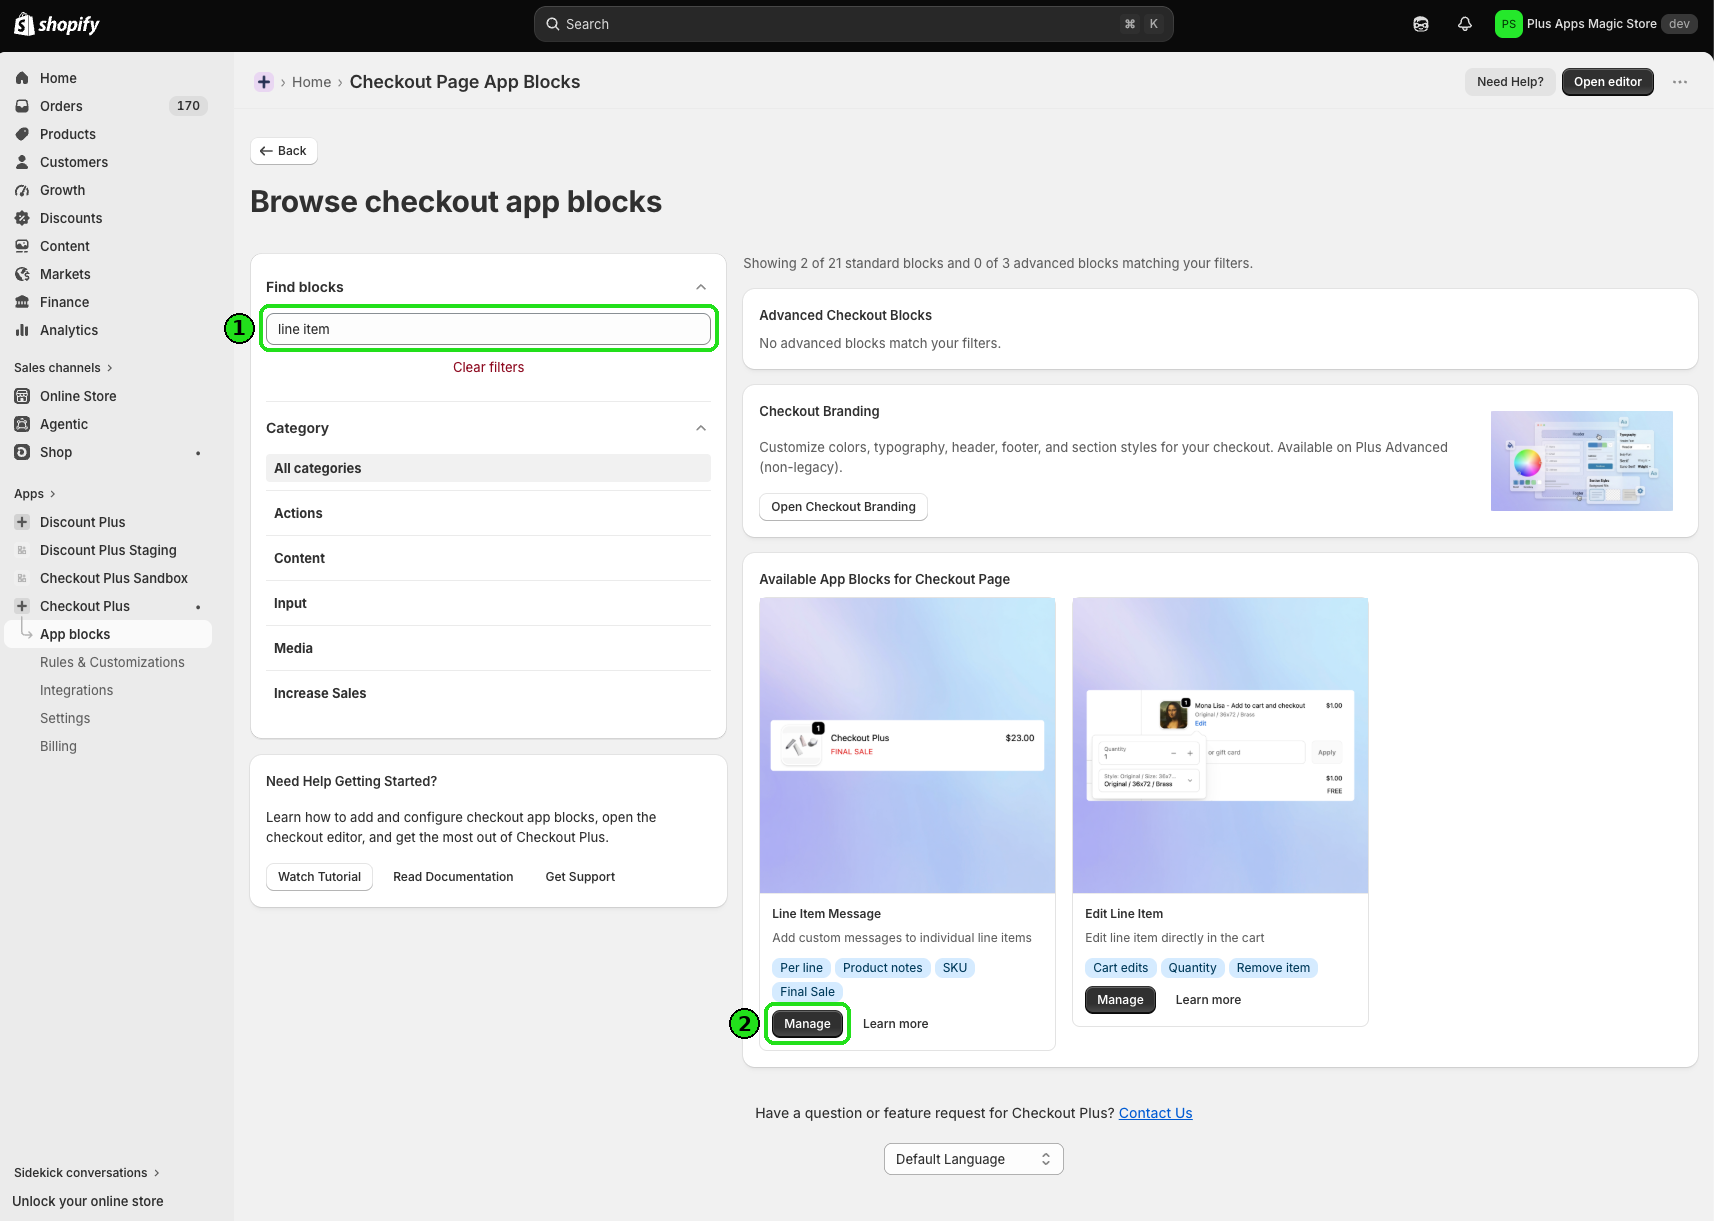
Step 3: Link a settings profile to the translation instance
- Open Line Item Message Advanced Settings (from Manage on the block card, or from the editor flow).
- Choose a profile tab (Profile 1–Profile 5 — up to five independent profiles).
- Expand Advanced.
- Set Translation instance to Final Sale Message (the instance you created).
- Select Save.
You can also jump to the same translations UI with the Translations button in the Advanced Settings header.
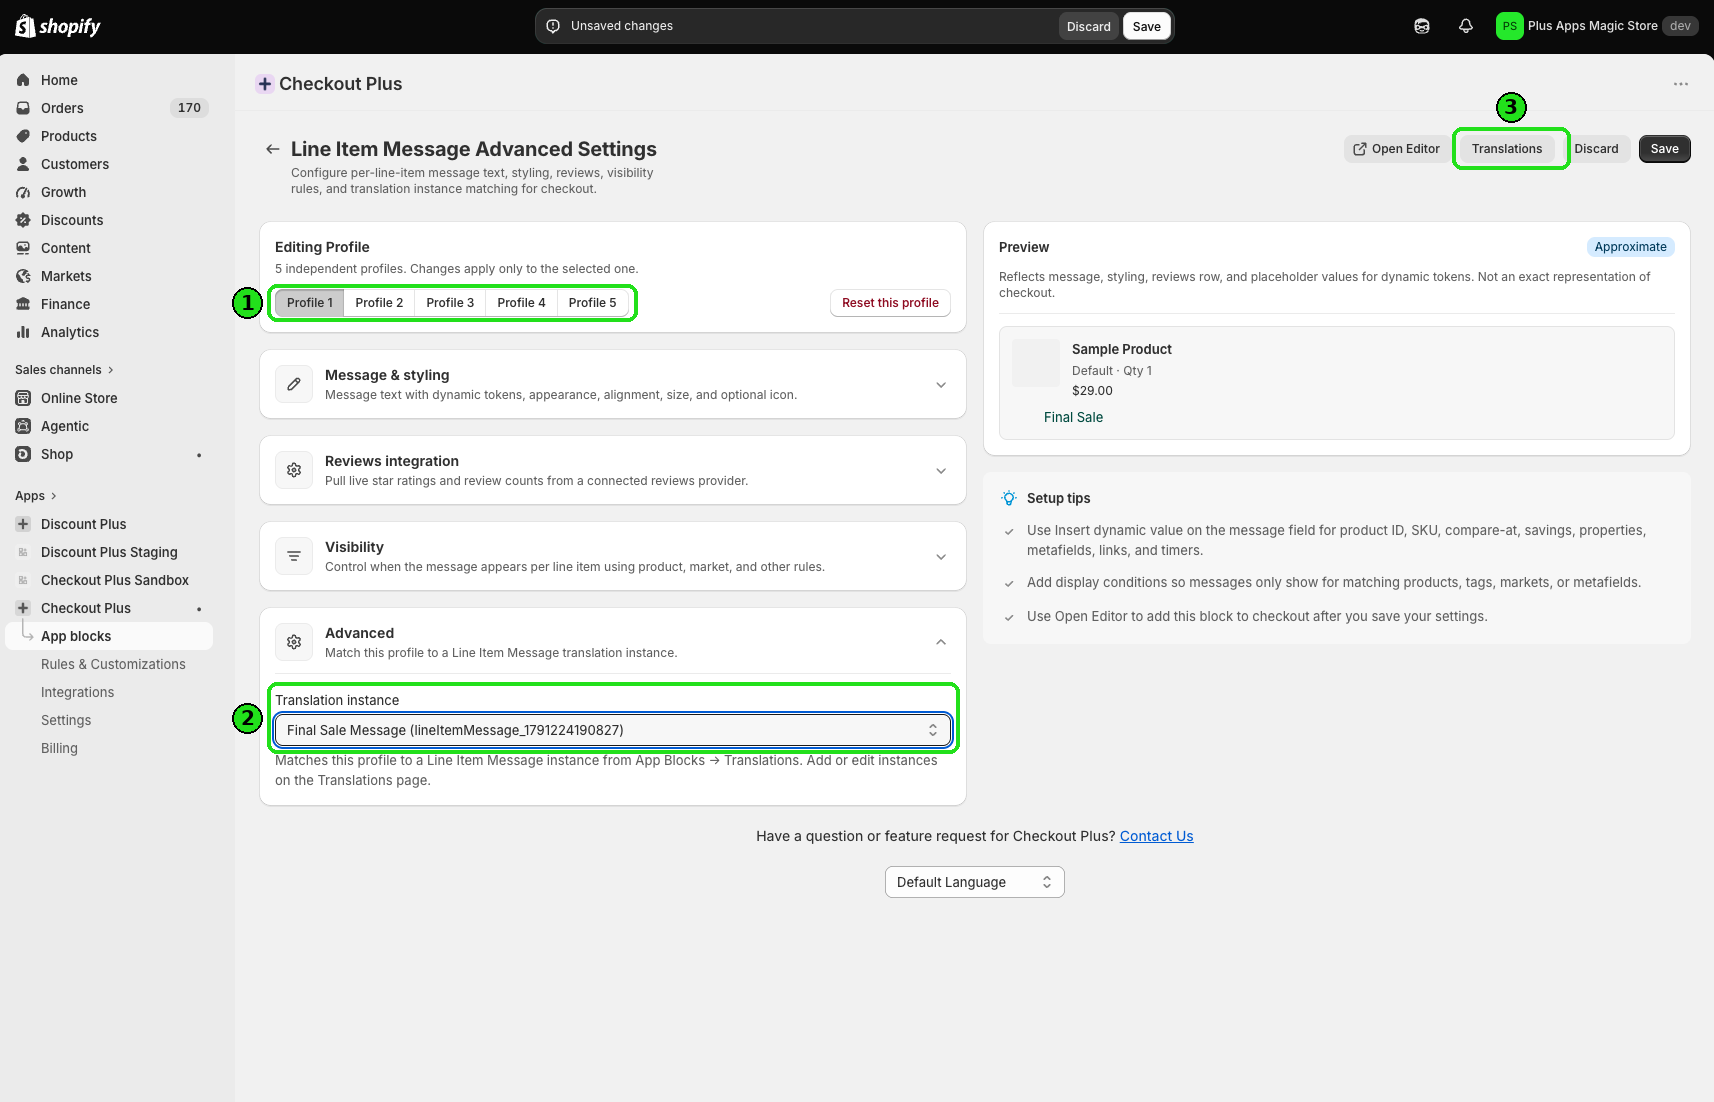

Step 4: Add the block in the Checkout Editor and pick the profile
- From Advanced Settings, select Open Editor (or use the Open Checkout Editor prompt if the extension isn’t on checkout yet).
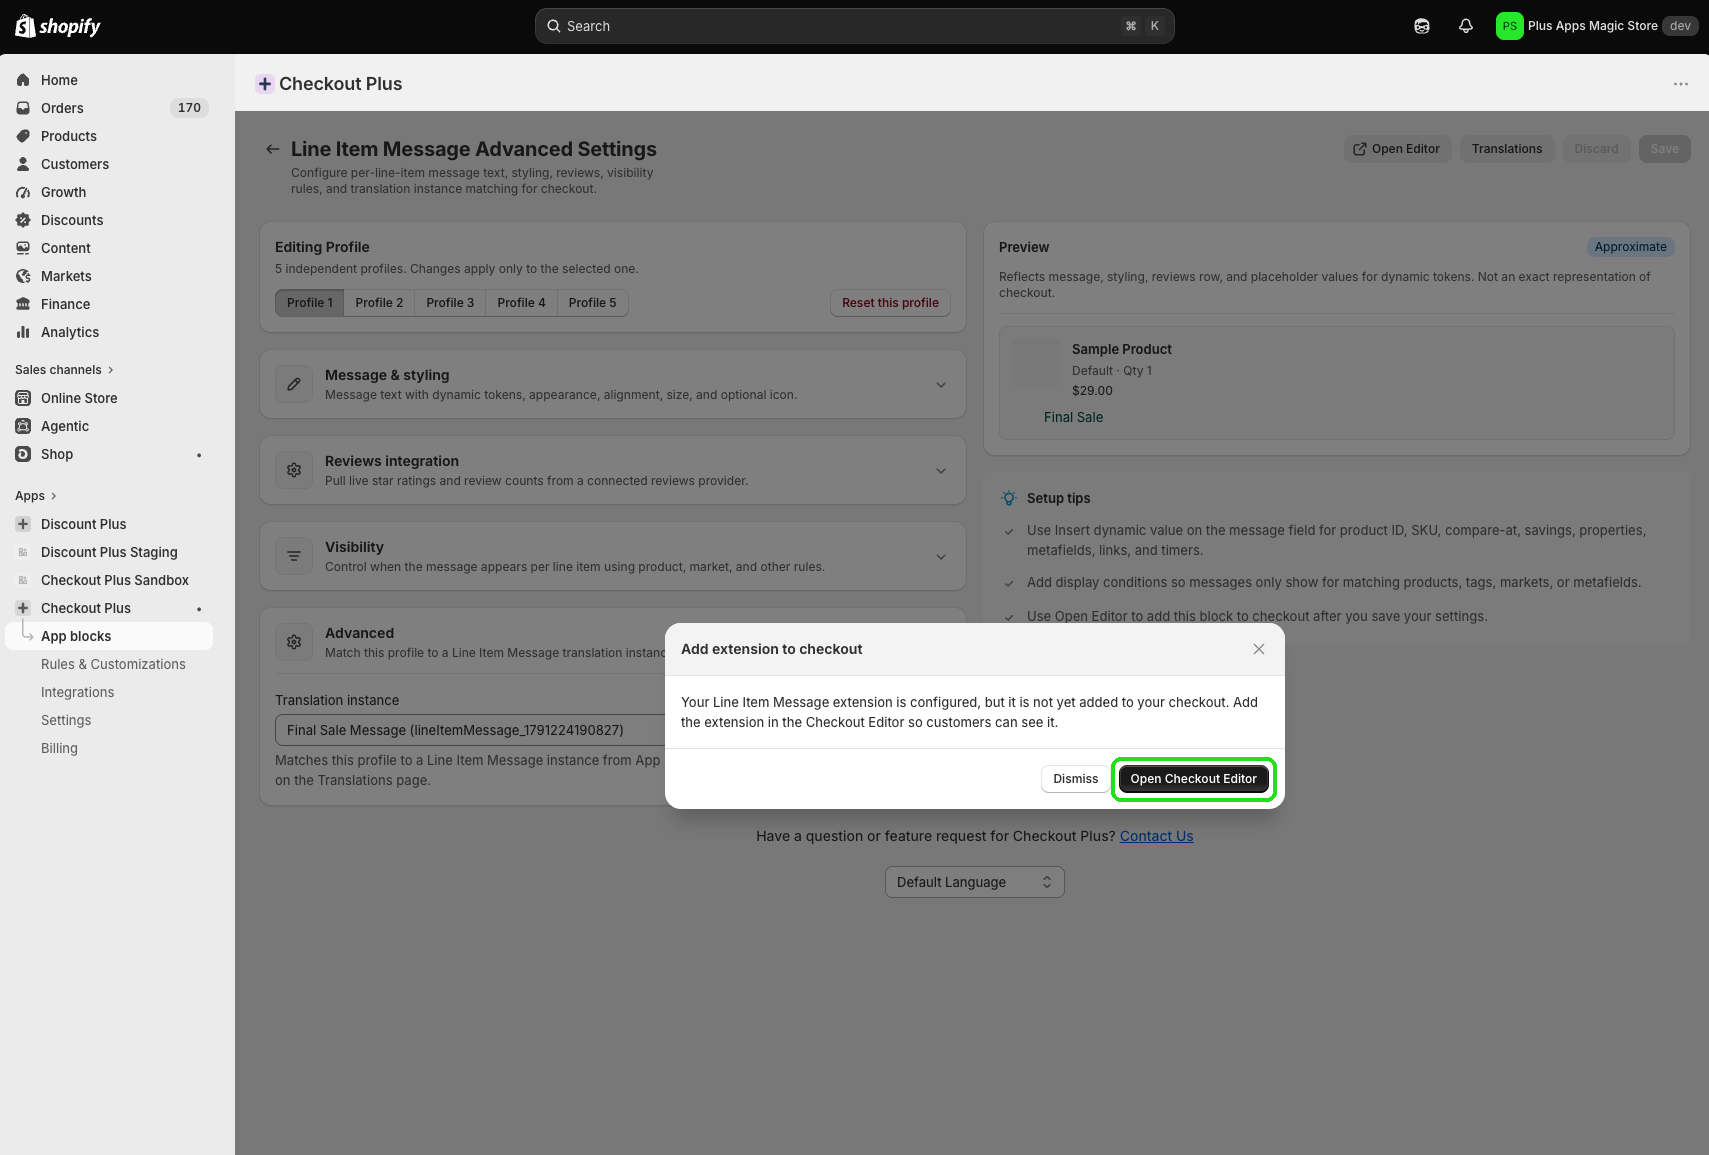
- In the Checkout Editor, select Add block where the message should appear (often under Order summary / cart line items).
- Search for
lineand choose Line Item Message under Checkout Plus — not Checkout Plus Sandbox.
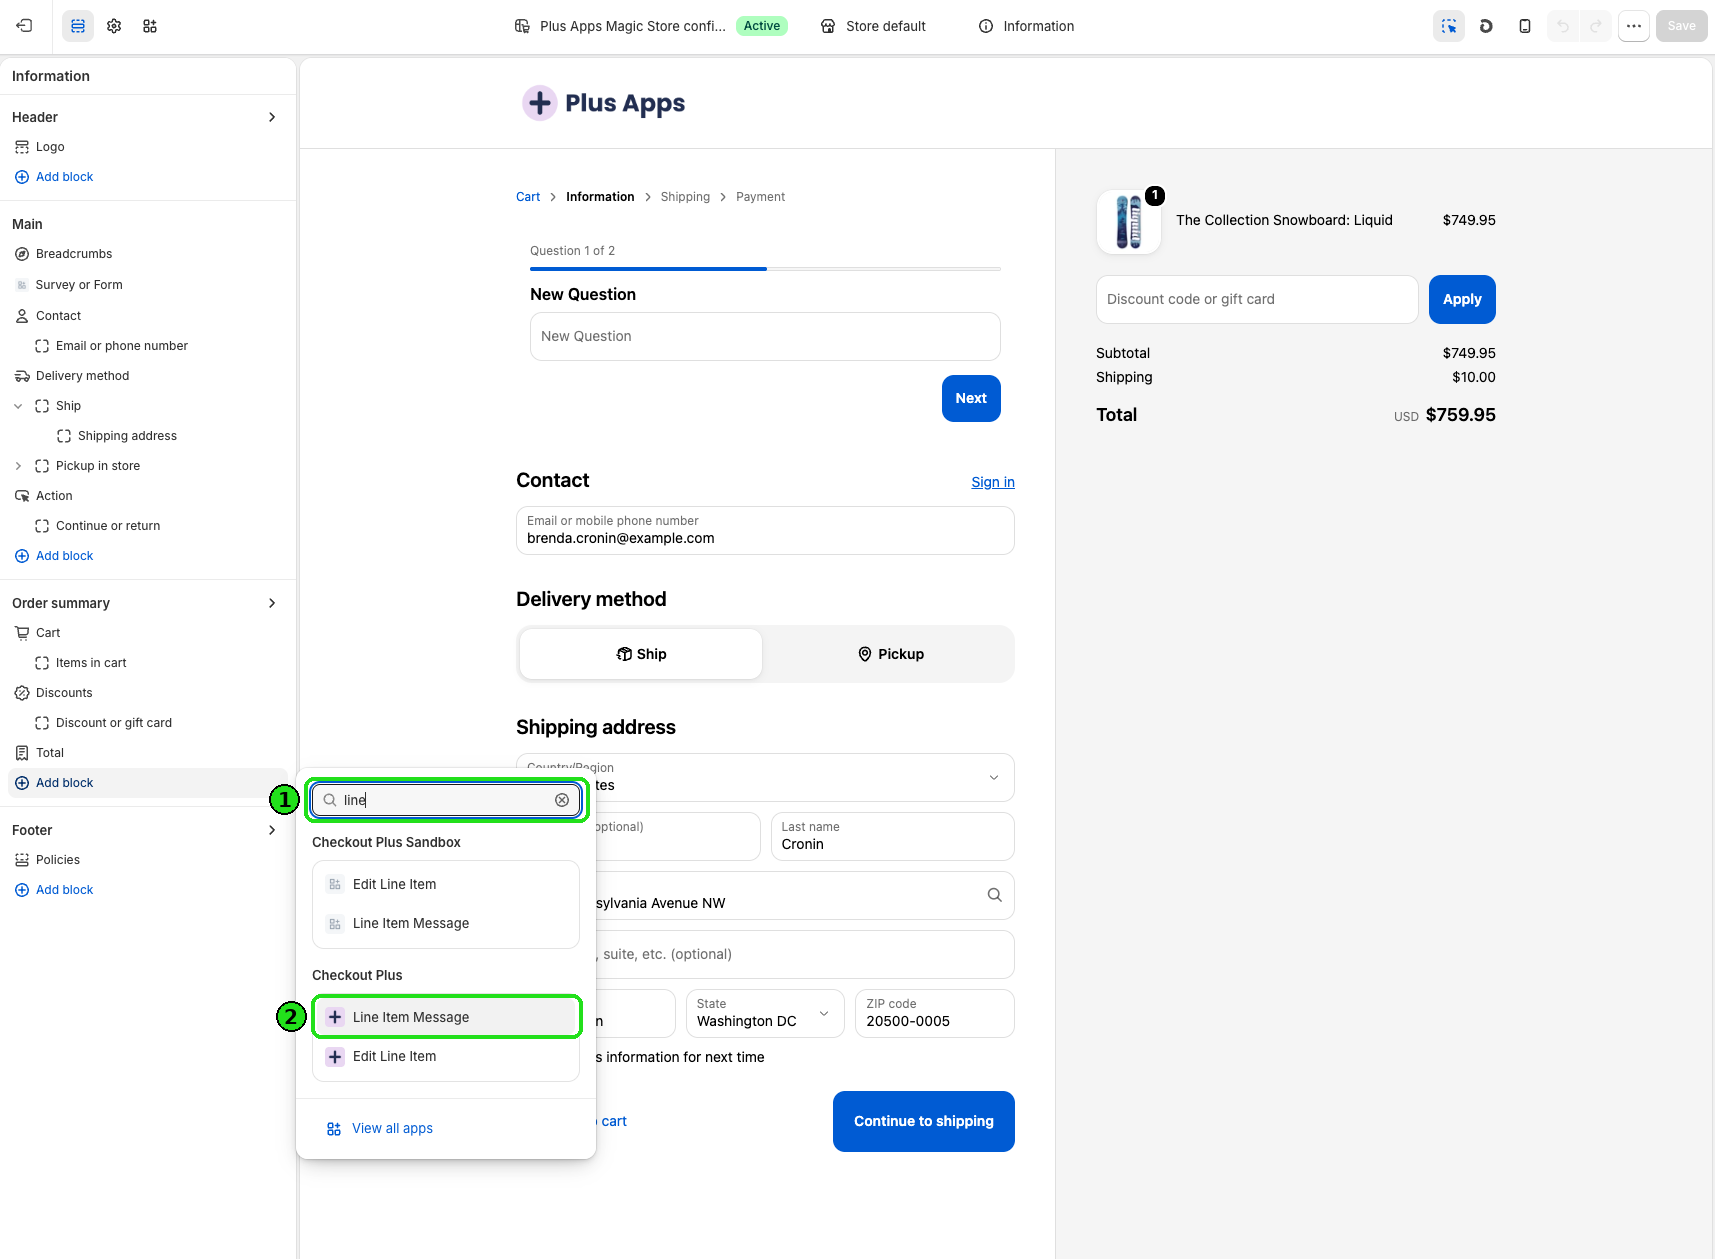
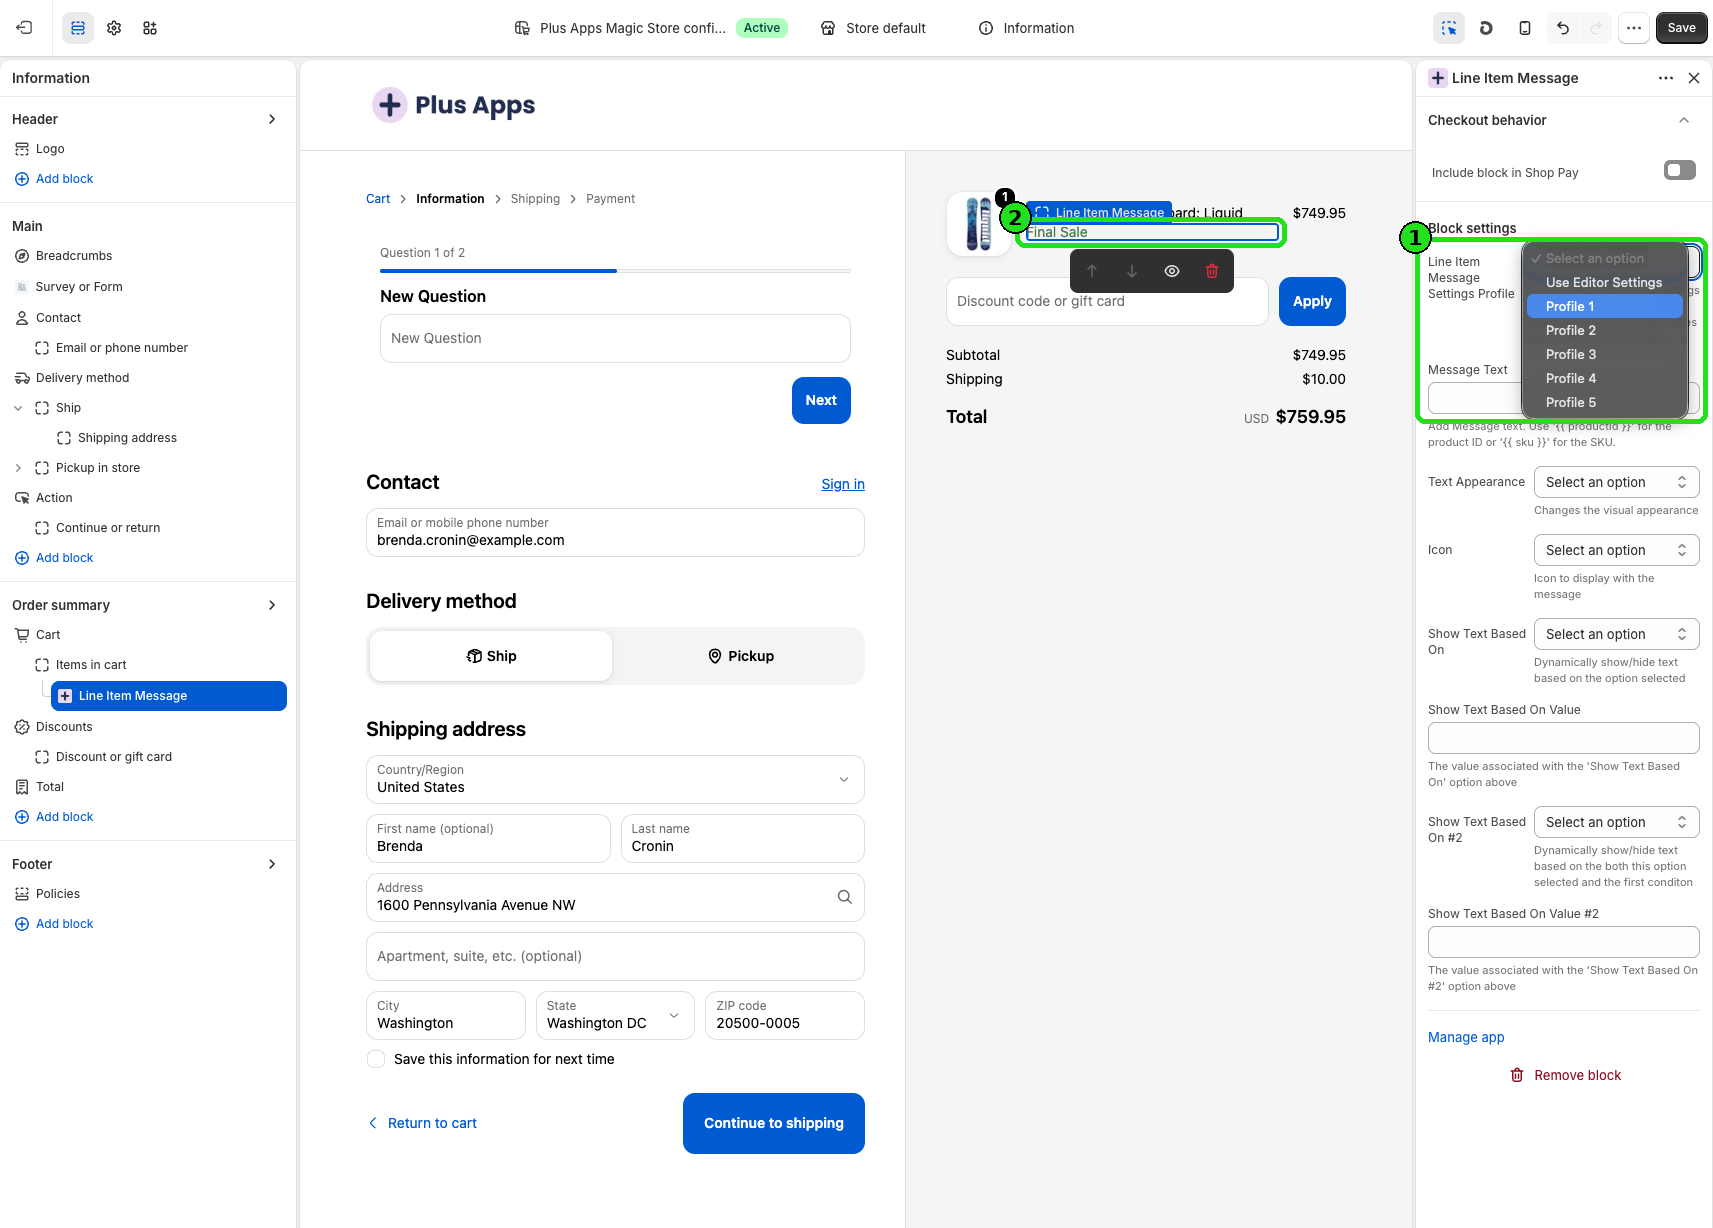
- In the block settings, set Line Item Message Settings Profile to the profile you linked (for example Profile 1).
- Confirm the preview shows your default message (for example Final Sale), then Save.
Step 5: Preview in another language
- In the Checkout Editor or a real checkout, switch the shopper language / market to Spanish (or your translated locale).
- Confirm the line item shows venta final (or your translation) instead of the default.
- Switch back to the default language and confirm Final Sale returns.
Exact language/market controls live in Shopify admin and the editor chrome — use whatever your store already uses for localized checkout.
Using multiple instances
Need different messages on different products or placements (final sale vs. pre-order vs. gift note)? Use more than one instance:
- Create a unique instance for each message in Extension translations (for example Final Sale Message and Preorder Note).
- Configure each instance’s Default and language fields, then Save Changes.
- Link each settings profile’s Advanced → Translation instance to the matching instance name.
- In the Checkout Editor, add a Line Item Message block for each placement and assign the matching Settings Profile.
- Use Visibility rules on each profile when a message should only show for certain products, tags, or markets.
That matches the three-step note on the Add New Line Instance modal, plus profiles so each checkout block can point at the right translated text.
Tips
- Name instances after the message, not the language (Final Sale Message, not Spanish Message).
- Translations override editor / profile message text when a match exists for the customer’s language.
- A blank language field falls back to the block’s editor or profile message for that language.
- Regional locales fall back: exact (
fr-CA) → base (fr) → default. - Keep App language (Settings) separate from Extension translations — one is for you in admin, the other is for shoppers at checkout.
- Prefer one clear message per instance; use Visibility rules instead of stuffing every case into one string.
Troubleshooting
- Still seeing English (or editor text) for Spanish shoppers: Confirm Spanish (es) is filled for that instance, you clicked Save Changes, and the block’s Settings Profile points at the profile whose Translation instance matches.
- Wrong message on a line item: You may have multiple instances — check Select line instance and the profile’s Translation instance name.
- Translation missing for fr-CA but fr works: Expected: regional falls back to base, then default. Add fr-CA only if you need different copy.
- Changes don’t show in checkout: Save Advanced Settings and the Checkout Editor. Hard-refresh the preview.
- Highlighted Sandbox block by mistake: Remove the Sandbox block and add Line Item Message under Checkout Plus.
- App UI language changed but checkout didn’t: App language only affects the Checkout Plus admin UI in this browser — use Extension translations for checkout copy.
Need help? Contact Checkout Plus support from the app (Need Help? / Contact Us), or from the app home Help and Resources card (Documentation, Get Support, or live chat). Include a screenshot of Extension translations for your instance and the Checkout Editor block’s Settings Profile.
Ready to customize checkout messaging in every language you sell? Try Checkout Plus on the Shopify App Store.