

A countdown timer in checkout creates urgency for flash sales, shipping cutoffs, or limited offers. In Checkout Plus, you add it through a Custom Banner: write your message, then insert a Countdown timer dynamic value so shoppers see a live countdown in the banner.
Watch the walkthrough above, or follow the steps below.
Before you start
- Checkout Plus installed on your Shopify store
- Access to the Shopify Checkout Editor (checkout placement requires Shopify Plus; Thank You and Order Status pages work on all plans)
- Your offer copy ready (for example: sale name, discount code, and how long the timer should run)
Step 1: Open Custom Banner settings in Checkout Plus
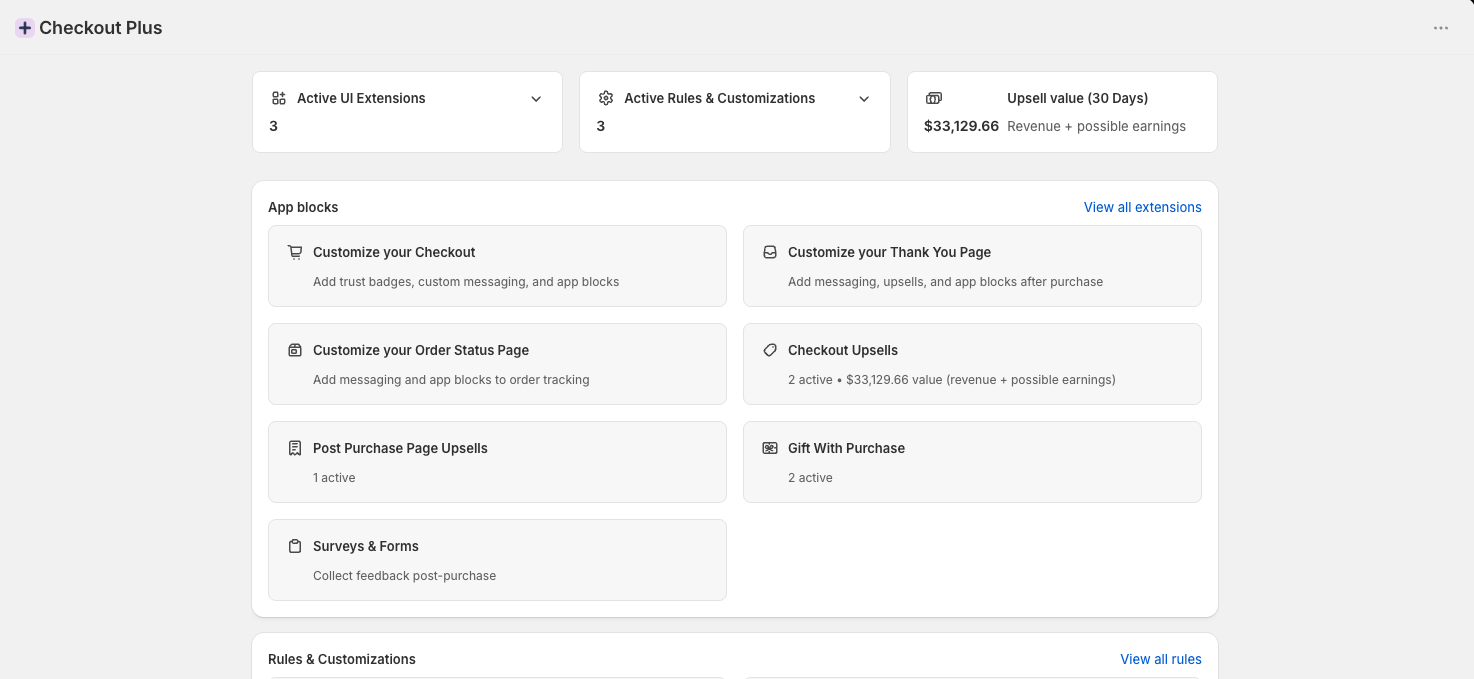
- In Shopify admin, open Apps → Checkout Plus.
- Under App blocks, select Customize your Checkout.
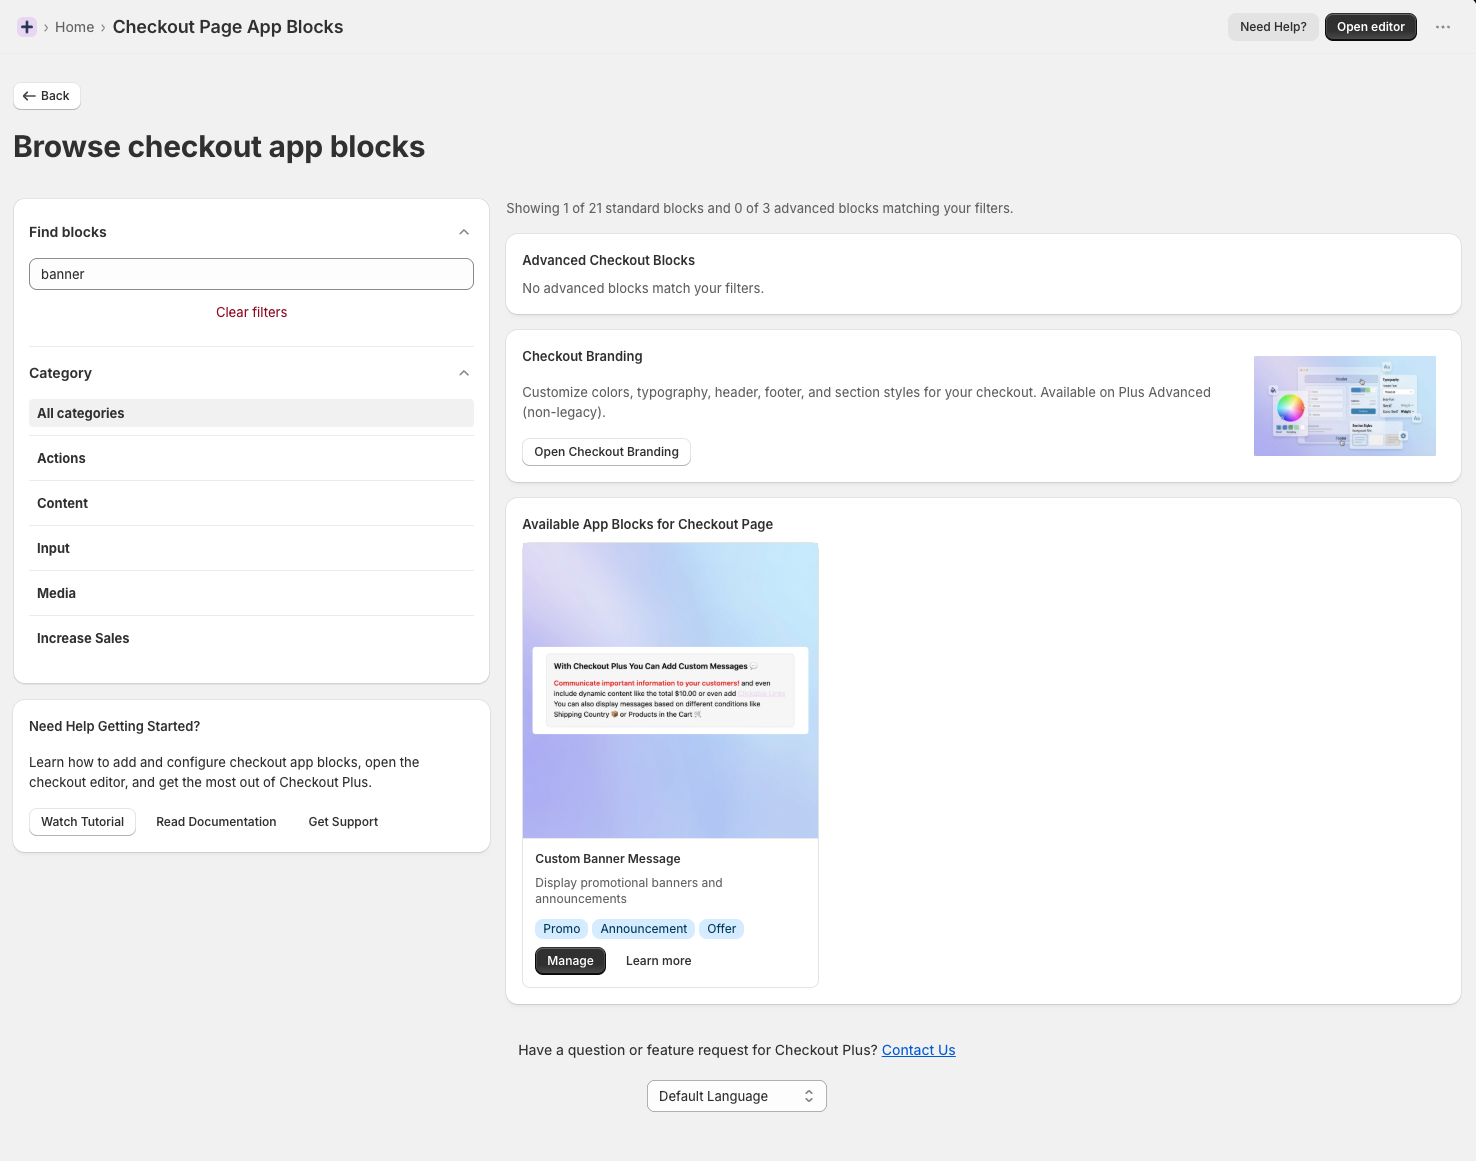
- On Browse checkout app blocks, search for banner.
- Open Custom Banner Message and select Manage.
Step 2: Create or select a banner profile
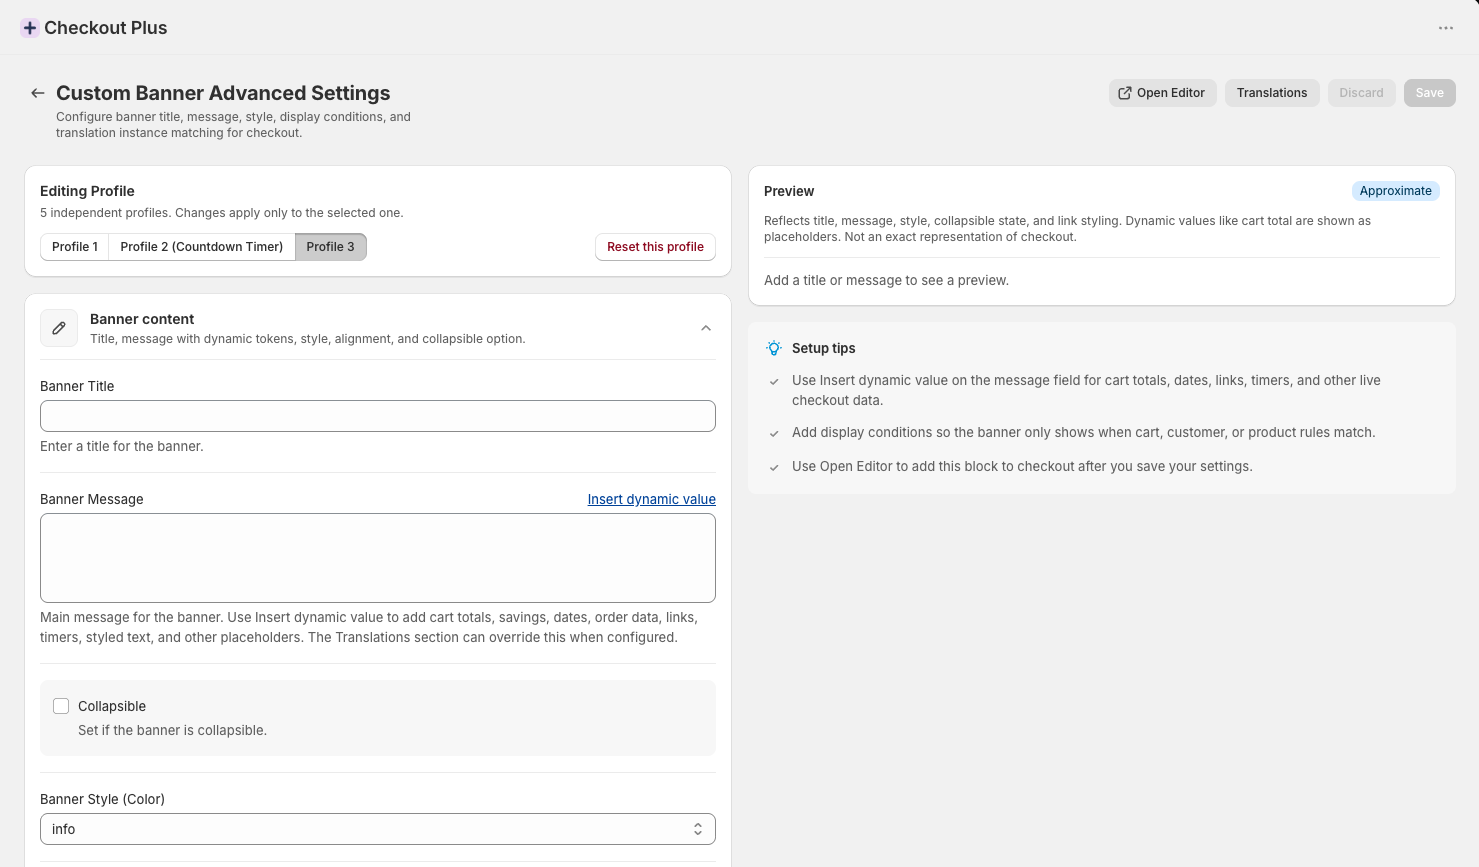
- Open Custom Banner Advanced Settings.
- Choose a profile tab (up to 5 independent profiles).
- Optionally set a Banner title.
- Leave Banner Message ready for the next step.
- Set Banner Style (Color).
- Set Text Alignment if needed.
Step 3: Insert the Countdown timer dynamic value
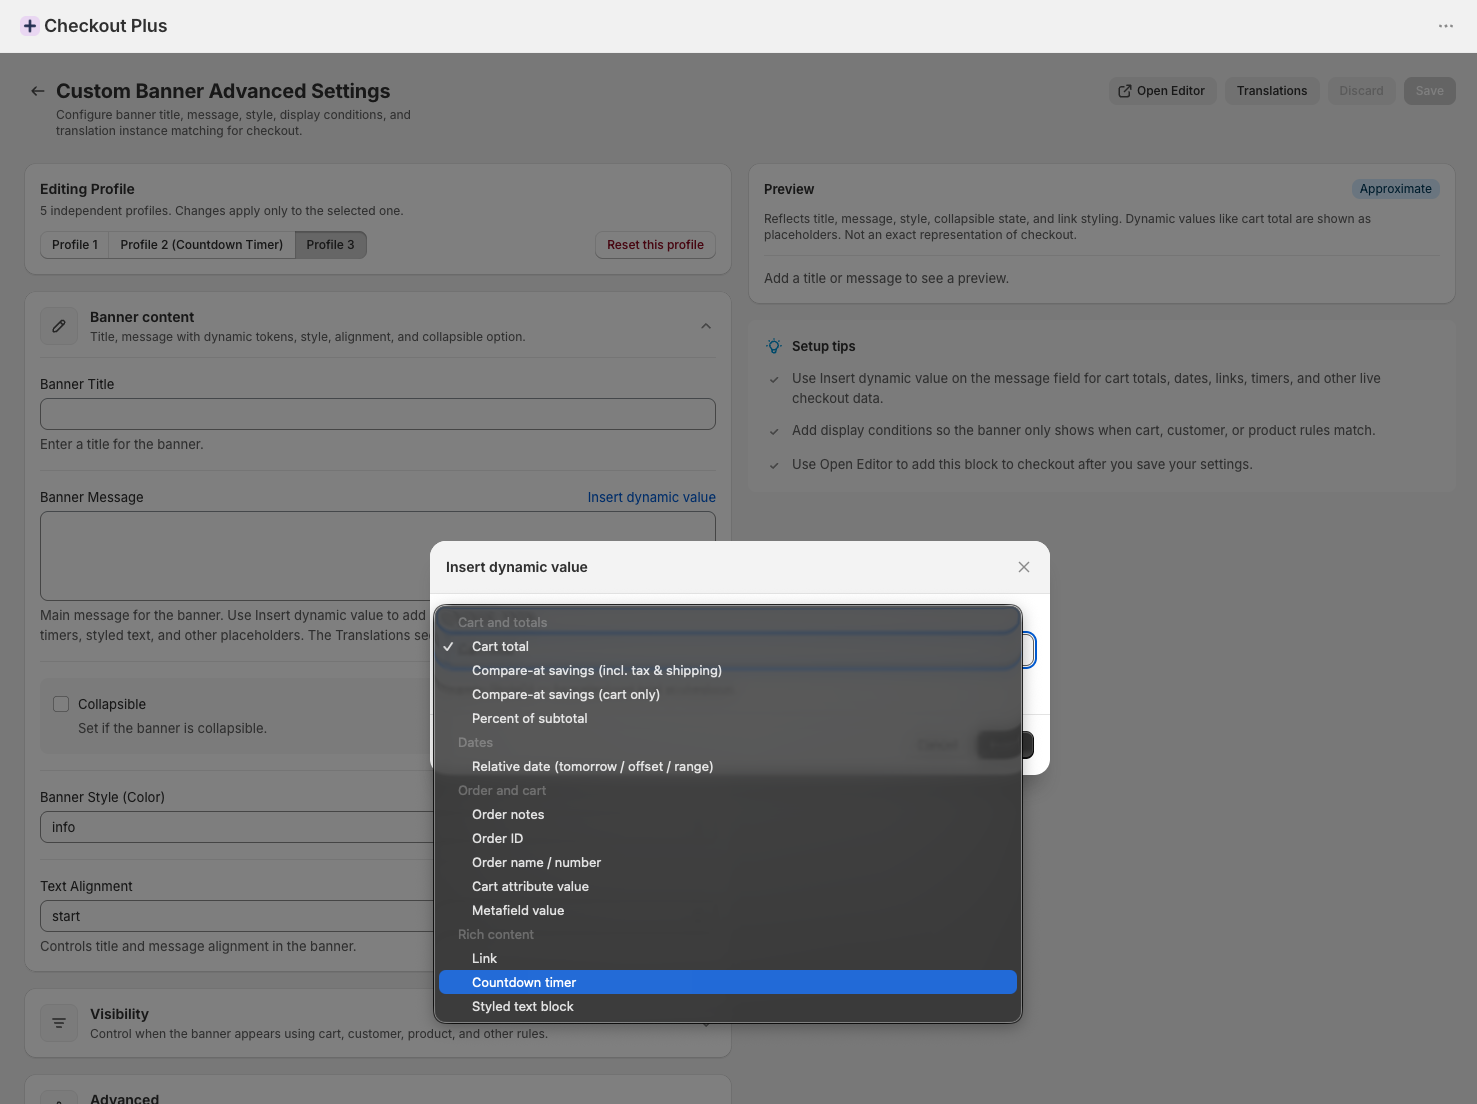
- Next to Banner Message, select Insert dynamic value.
- Under Rich content, select Countdown timer.
- Select Insert.
- Add surrounding copy so the timer reads naturally.
- Configure any timer options after insert.
- Select Save.
Tip: Dynamic values also support cart totals, dates, links, and styled text. Keep the banner to one clear offer plus the timer.

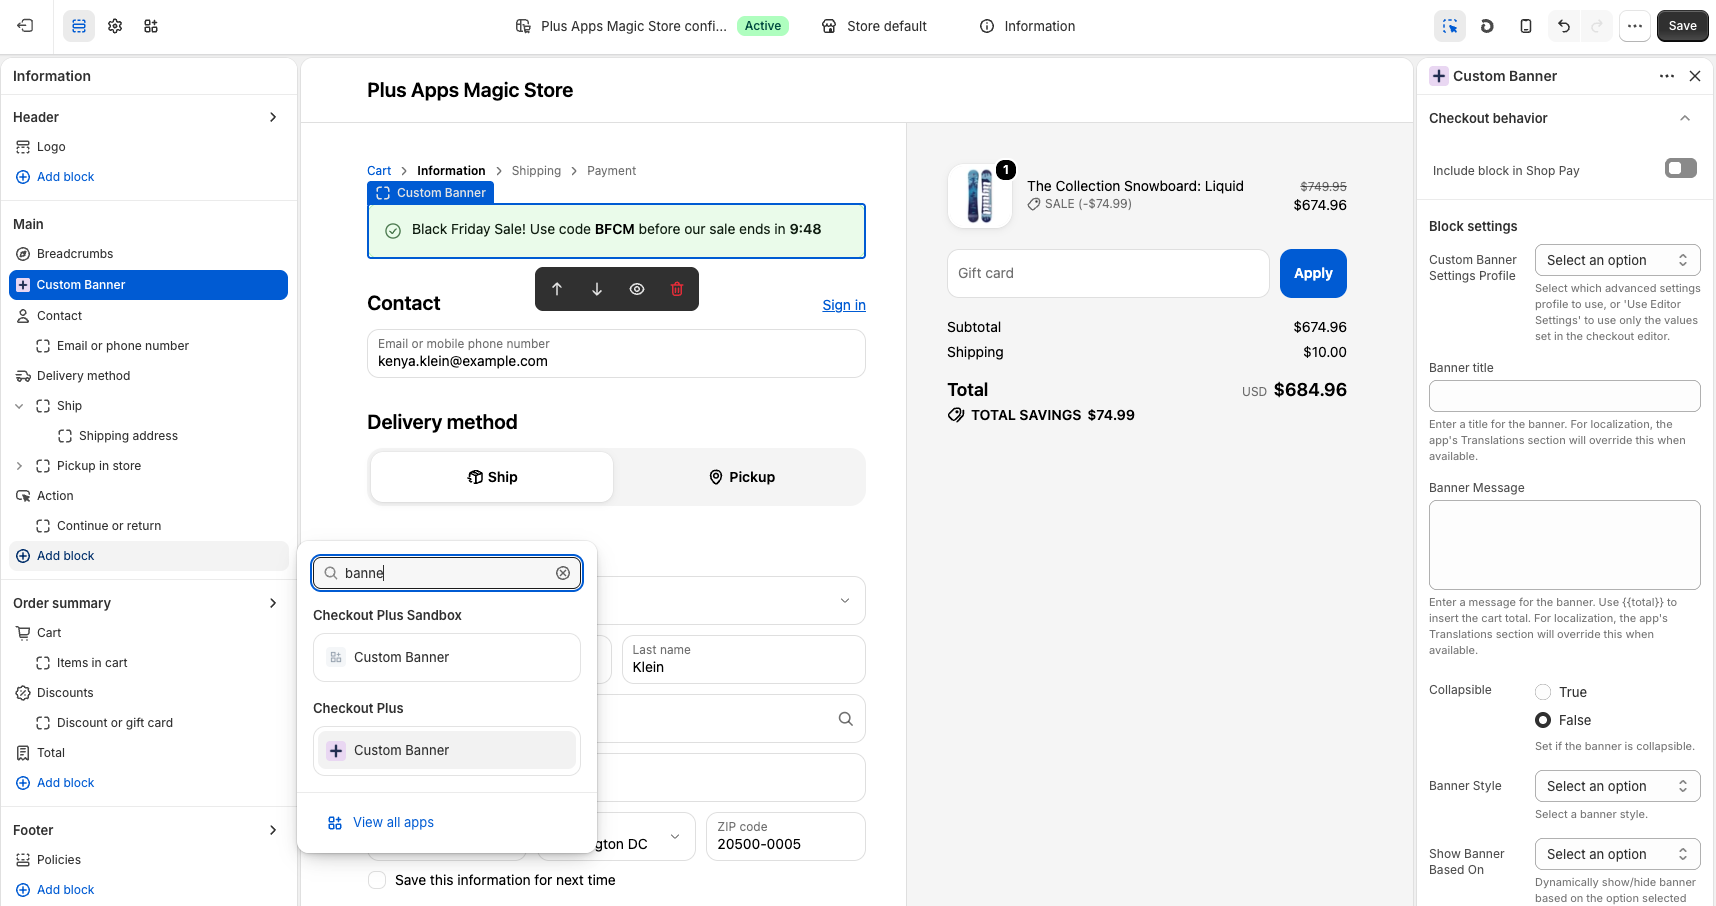
Step 4: Add the Custom Banner block in the Checkout Editor
- From Advanced Settings select Open Editor, or Settings → Checkout → Customize.
- On the checkout step (often Information), select Add block.
- Search banner and choose Custom Banner under Checkout Plus.
- Set Custom Banner Settings Profile to the timer profile; set style/conditions; optionally Include block in Shop Pay.
- Select Save.
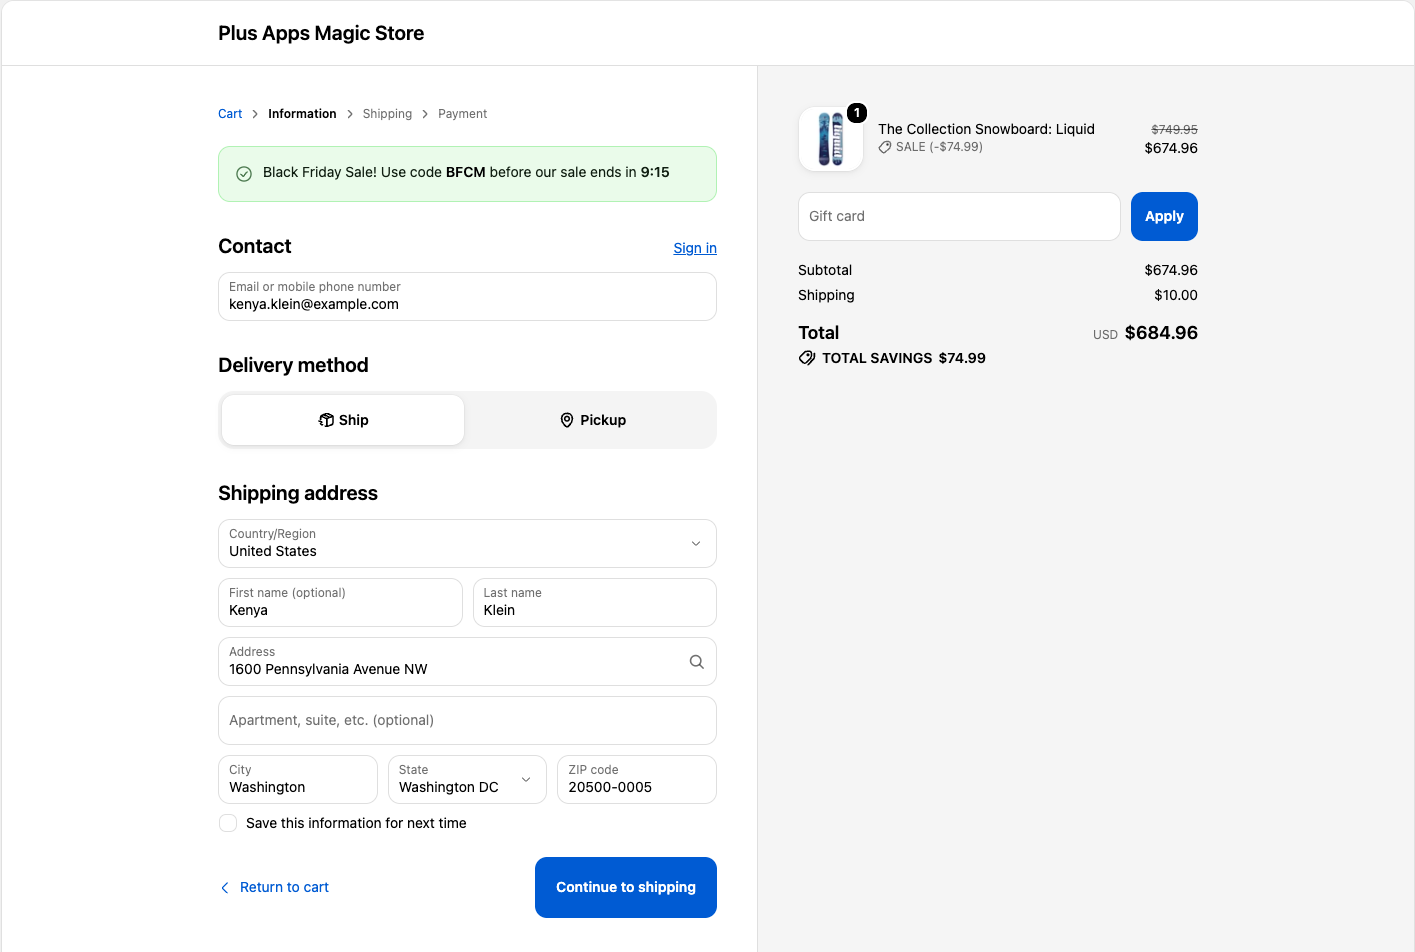
Step 5: Preview and test
- Confirm preview shows message and ticking time.
- Add product to cart and open checkout.
- Confirm timer placement and countdown across steps.
- Confirm expired behavior when timer hits zero.
Tips
- Pair timer with a real deadline
- One timer per screen
- Use Show Banner Based On when offer is limited
- Prefer short copy
Troubleshooting
- Banner doesn’t show → check block saved + correct profile
- Timer missing → re-insert Countdown timer and Save
- Missing in Shop Pay → enable Include block in Shop Pay
- Wrong profile → match Advanced Settings profile to editor
- Can’t place on checkout → needs Shopify Plus; else Thank You / Order Status
Need help? Contact Checkout Plus support from the app (Need Help? / Contact Us), and include a screenshot of Custom Banner Advanced Settings and Checkout Editor block settings.
Ready to try it? Install Checkout Plus from the Shopify App Store.